


Images updated September 2019
Lightroom’s radial filter is an extremely quick and powerful tool. The radial filter tool is typically used in portrait photography in order to highlight the subject and imperceptibly attract viewer attention towards a customizable area of the photo. Its use, however, extends to all types of photography. As with most things software, learning with real world examples is the best way to take advantage of its merits. The radial filter tool is found in Lightroom’s Develop module and is the second tool in from the right, in the tool bar.

To use this tool, we either click on the icon or use the Shift+M keyboard shortcut. The radial filter menu is virtually identical to that of the graduated filter and the adjustment brush. In other words, it contains a massive range of parameters and offers an infinite way to creatively combine them.

The top section has the “New” tab that is used to start a new radial filter (default choice when the tool is first opened), the “Edit” tab is used to modify existing uses, and the “Brush” tab is used to add or to subtract areas of intervention. On the right of the “Effect” subsection, we have the usual drop-down menu of presets.

It's never superfluous to stress that these presets are shared across the radial filter, adjustment brush, and graduated filter tools. Therefore, getting acquainted with one of them is beneficial for all three tools. Now, if you've applied the radial filter tool and you don't see anything happening to your photo, it's because you first must create a circular or oval selection directly on your photo in order to apply this tool. To do this, click on any starting point and drag to create the desired circular or oval selection. If the aim is a circular selection, holding the Shift key while dragging will prevent the creation of oval shapes.

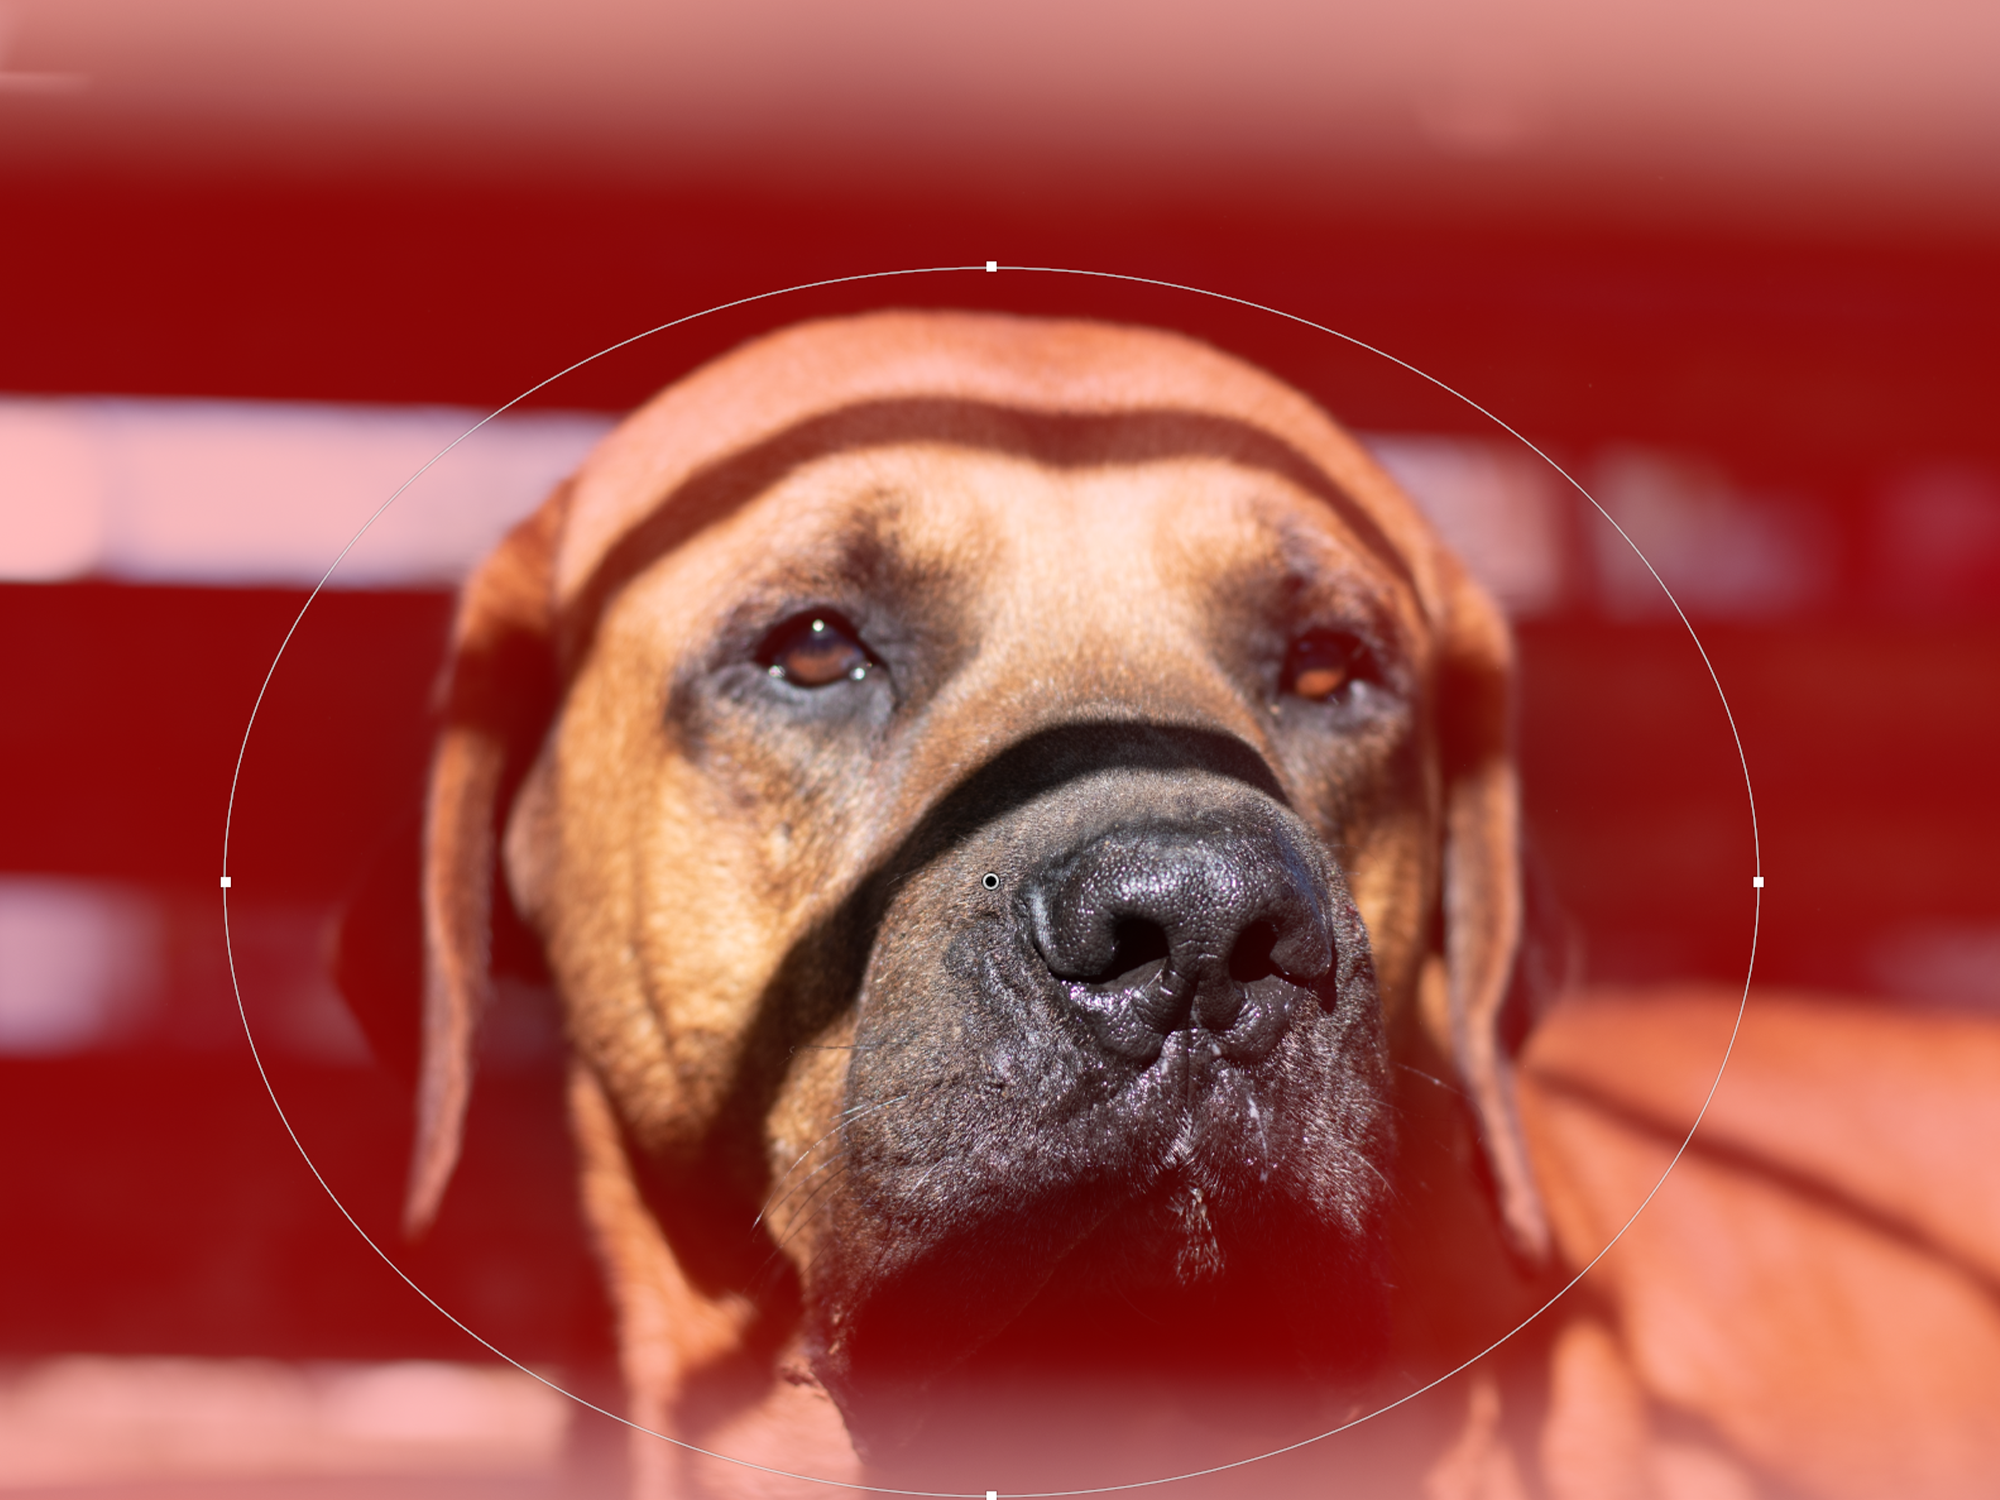
As for any local adjustment in Lightroom, our selection is accompanied by a circular handle which has a black dot in its middle when selected. Of course, we can have more than one selection by clicking on the “New” tab and repeating the process.
Notice that I have not moved any effects sliders yet. Before doing that, I want to refine my selection. This can be done via rotation, by dragging outside the selection and by moving the white square adjustment boxes. To better highlight my subject, I changed from a circular shape to an oval shape:

For better awareness of the selected area, it's advisable to switch on the mask overlay. This incredibly handy feature may be accessed by pressing “O” on the keyboard or by ticking the “Show Selected Mask Overlay” box in the tool strip, just below the photo.

The red area shows where and by how much our effects will be applied. By default, the radial filter is applied inside the selected area. However, you may want to leave this area untouched and instead modify everything outside it. To do this, all you have to do is uncheck the “Invert Mask” box at the bottom of the radial filter menu. Immediately, the overlay moves outside the selected oval area.

I chose to use the white square handles to make my selection slightly larger to highlight the face of my subject. I also decreased my feathering from the default 50 to a lower value. I did this within the respective slider, at the bottom of the radial filter menu:

Now I'm ready to apply my effects. First, I reduce the exposure to make everything outside my selection darker and to keep the viewers attention inside the oval. Then, I reduce sharpness and clarity to slightly blur the same area (because there is already lens blur present, this simply makes everything creamier). Notice that I take a subtle approach to the remaining settings so that my intervention is not too obvious. I want my edits to naturally enhance the photo.

Keep in mind that if you go too strong on exposure, contrast, and light settings you'll get something like this:

Here is the final effect:

And now to fine-tune the final product. I've used multiple sliders, so it's impractical to modify them one-by-one if I don't like the intensity of the overall applied effect. Lightroom has a very subtle feature that does exactly what I want. By clicking on the small arrow exactly to the right of the preset name area, all sliders are replaced by a single “Amount” slider that changes everything simultaneously and proportionately:

Even with a heavy-handed approach to slider movement, the amount slider enables us to achieve the subtle effect that I mentioned earlier. Although there's no need for any brushing here, it's helpful to mention again that the “Brush” tab at the top right of the radial filter menu allows us to add or subtract affected areas in exactly the same way we might use the adjustment brush tool.
I hope my example is a demonstration of how easy and effective it is to use Lightroom’s radial filter tool. Clearly there is room for both the gradient filter and the adjustment brush. They're both very flexible tools in terms of geometry and they're both suitable for a multitude of adjustments. The radial tool, however, is unmatched in terms of simplicity. It will most certainly become an indispensable tool one you've got the hang of it.
About the Author: Dimitrios Matsoulis is an engineer that studied in the UK and has an industrial automation and solar energy background. His love for outdoor activities and photography has naturally led him to photo editing. He uses Lightroom and Photoshop for his own photography as well as freelancing gigs. He lives in Greece and maintains his online presence via his personal photography blog, 500px and Instagram.


