


Images Updated September 2019 using Lightroom Classic 8.4
How to Use Lightroom's Spot Removal Tool

The spot removal tool in Lightroom is the go-to method to deal with annoying or undesirable spots in your photos. Spot removal is frequently used in portrait or modeling photography to improve the appearance of the skin. It is also used for the removal or duplication of fairly large objects or the elimination of annoying dust specks from a dirty camera sensor.
To access the spot removal tool click when starting from the Library module, press D to go to the Develop module. On the right side of your window, between the histogram and the Basic panel you will see a toolbox with six icons. Click on the second icon from the left to use the Spot Removal tool.

Tip: A quick and simple shortcut is to press Q when you are in the Library or the Develop module. This will highlight the Spot Removal icon and its corresponding menu appears just below it.

When you hover above your photo, the mouse pointer will be replaced by two circles:

The inner circle is the area inside which your actions take full effect. The outer ring between the two circles is the feather area where any effect wears out progressively from 100% at the inner circle to 0% at the outer circle. As shown in the image below, when you click on an area on your image, Lightroom will hunt for an appropriate replacement area and show you both the replacement and replaced areas with an arrow in between. Just remember that the arrow starts from the replacement or sampled area and ends up in the replaced area where the effect takes place.

With this in mind here are some tips for managing the available settings:
- Clone / Heal option: The spot removal tool uses either one or the other therefore before you start make sure you have chosen the one you need for each case. "Clone" will make a copy of the sampled area to the area you click on, whereas "Heal" will sample an area and try to blend it with the replacement area.
- Size: The size of your tool. Instead of using the cumbersome slider, keep hovering above the photo and adjust size by either scrolling your mouse wheel or by pressing the square brackets on your keyboard ("[" and "]").
- Feather: Adjusts the size of the feather transition zone.
- Opacity: Controls the strength of your action so that you improve blending. Note that you can adjust opacity even after you have clicked on an area.
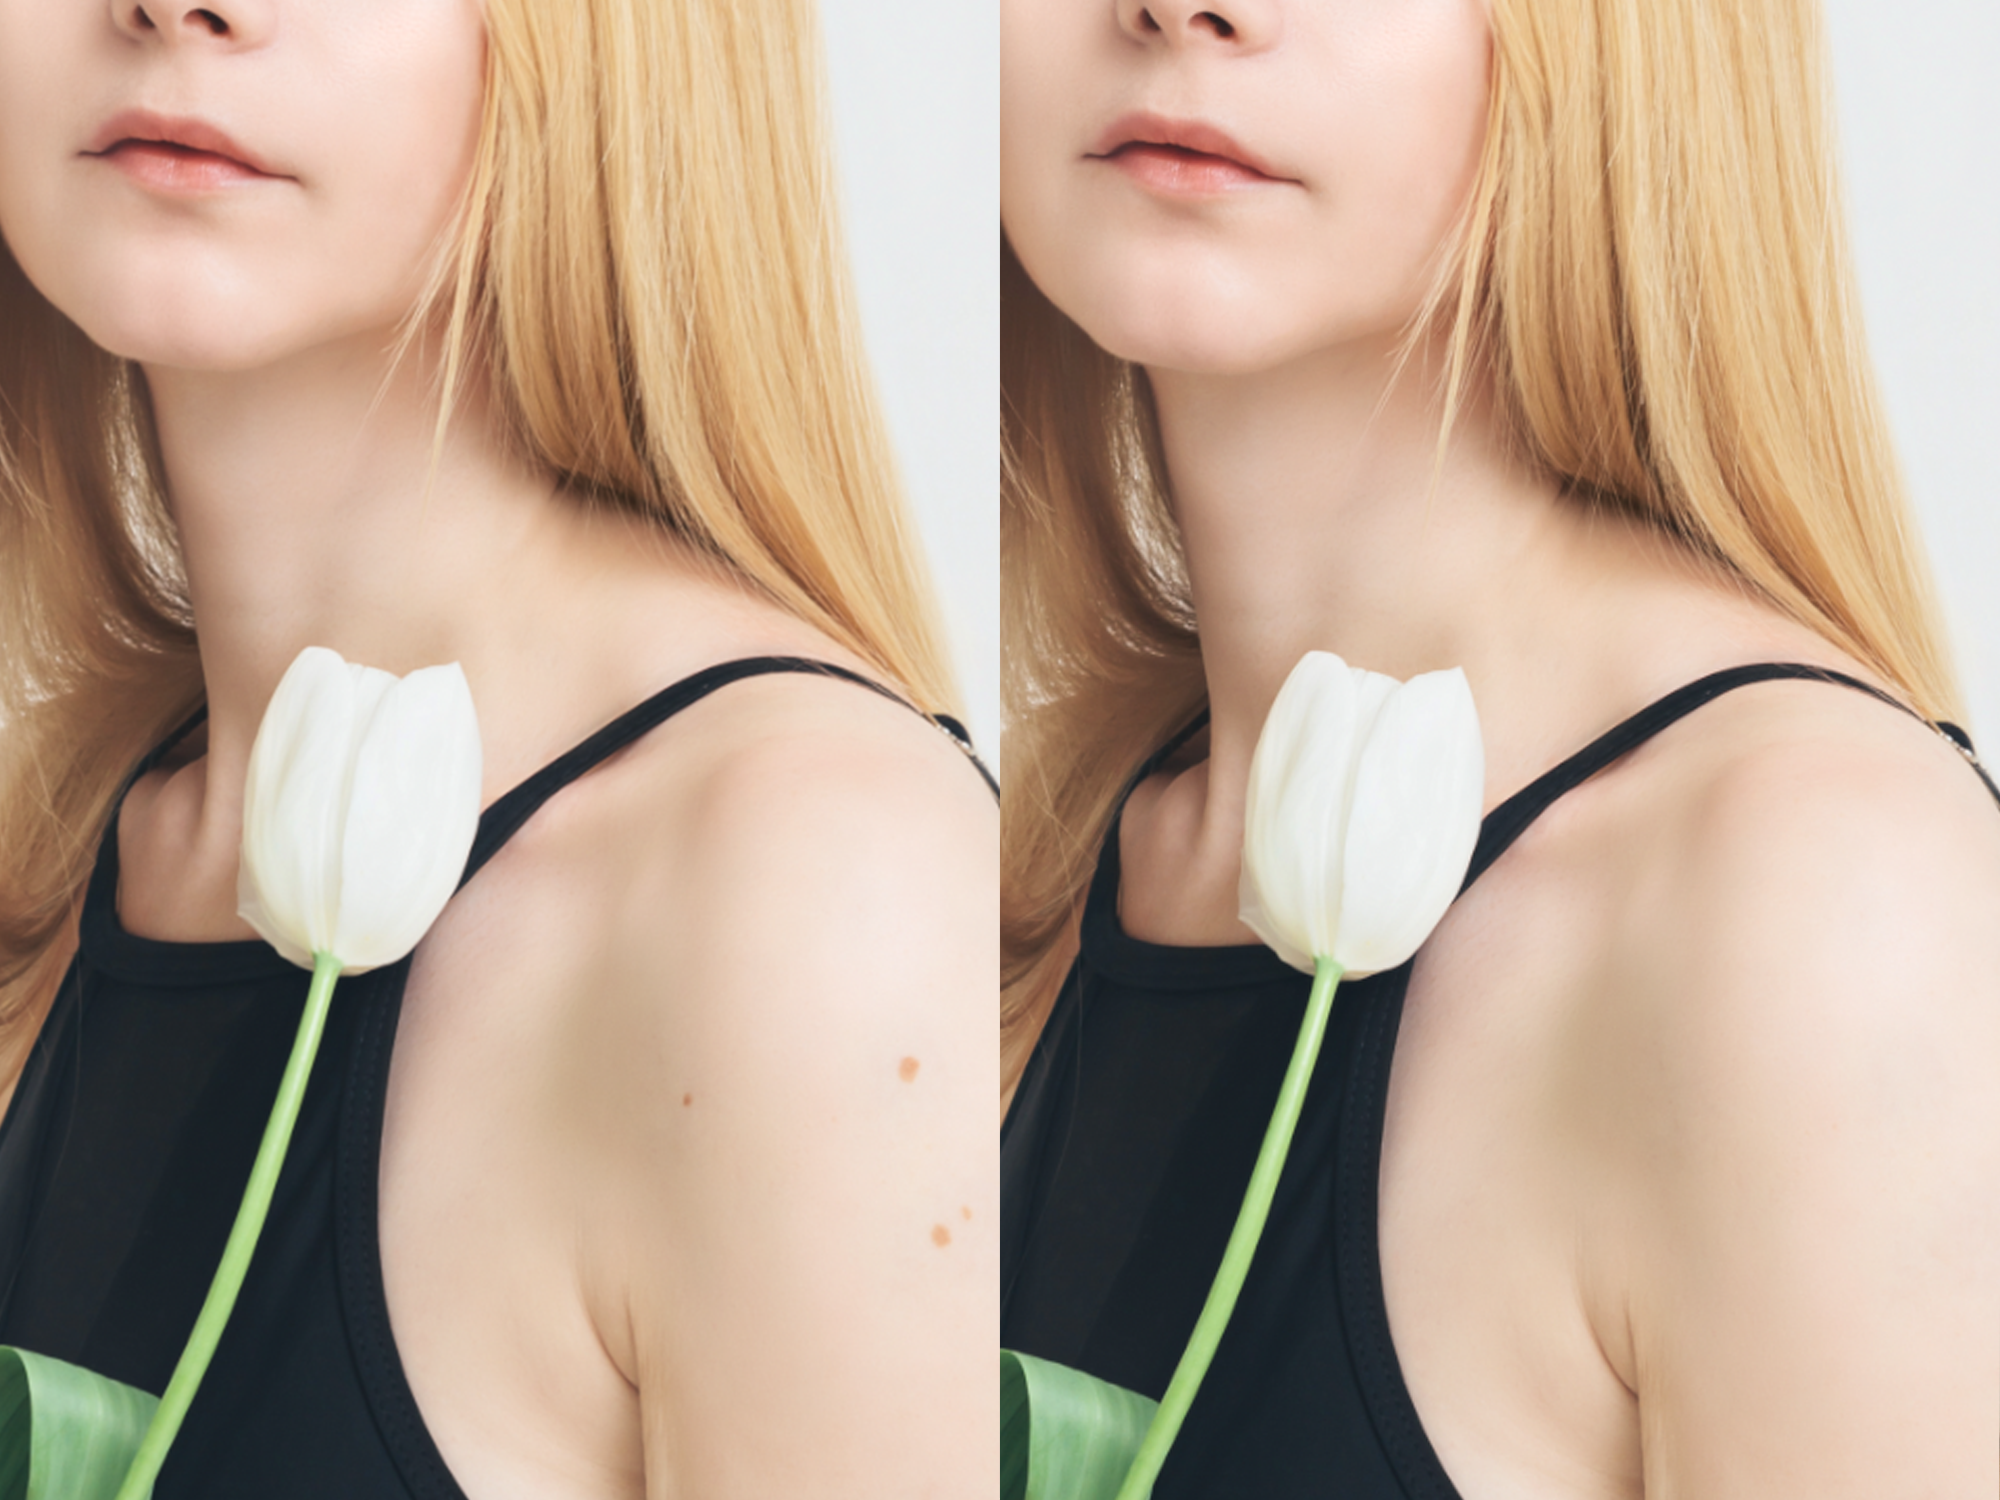
Let's apply the above in a typical example. The following photos show the before and after of a photo that we perfected by removing a small number of small spots from the models arm:


To maximize control and ease when using the spot removal tool, zoom in to the area interest by clicking on the "1:1" button at the Navigator panel at the top left of the Lightroom window (or any other suitable zoom ratio available from the dropdown menu just to the right of the 1:1 option). While in spot removal mode, when hovering above your photo Lightroom will show you all of the replacements that have taken place. Lightroom allows you to click on any pair and adjust in retrospect the clone/heal mode or the opacity. This will save you from clicking on a spot, pressing "Delete" to remove it and trying again.

Note that you can make the spot removal marks transparent by either pressing "H" or by simply taking your mouse pointer out of the photo panel. This way you can truly assess your work without distractions. Some times Lightroom does not make the best assessment as far as the sampling area is concerned and you might end up with unnatural results, as in the example below where Lightroom sampled her under-arm rather than a clear space of skin:

To get a better sample area you can do two things:
- Force Lightroom to sample from a different area by clicking on the spot you want to correct and pressing "/". Every time you press "/" Lightroom finds a new sample area until eventually it starts cycling through what it thinks are the best available spots.
- Click on the sampled area of the spot you want to correct and without letting go literally move to it a new spot that you think will do the job. When you let go check the result, keep going until you are happy with the result.
Another great tool is the "Visual Spots" view, which allows you to clearly visual any spots you may not catch with the naked eye or zoomed in:

Keep in mind that if the result is not perfect you can always play with the sample spot, the size of the tool, feathering and opacity. A nice feature of the spot tool is that it is not limited to round spots. You can mark any area to be replaced as long as you click and hold your mouse button down as in this example where a complete window is replaced by wall area.


The spot removal tool can also be used to duplicate nearby objects:

Sooner or later you will run into complicated cases where the spot removal tool will be unable to satisfy your needs. It is then that Photoshop's advanced selections and tools will become necessary. However, I can say from experience that thanks to the spot removal tool the vast majority of simple replacement tasks can be treated without leaving Lightroom. The spot removal tool is a very effective and quick tool that is worth exploring and having in your processing arsenal.
About the Author: Dimitrios Matsoulis is an engineer that studied in the UK and has an industrial automation and solar energy background. His love for outdoor activities and photography has naturally led him to photo editing. He uses Lightroom and Photoshop for his own photography as well as freelancing. He lives in Greece and maintains his online presence via his personal photography blog, 500px and Instagram.


