


Learn How To Make Local Adjustments Using the all New AI Masking Feature in Lightroom
With the latest updates to Adobe’s Lightroom suite, Adobe has transformed their local adjustment tools into a single genius Masking tool featuring one-click AI-powered “Select Subject” and “Select Sky” tools. AI-based smart selection isn’t a new project for Adobe, having been fantastically executed in Photoshop across desktop and iPad. But smart masking is new to Lightroom. Now popular local adjustments tasks are click-and-slide simple. No more brushing and erasing for hours! Simply click to apply, and slide to adjust.
Previously, Lightroom's localized masking options were limited to linear gradient, radial gradient, and the local adjustment brush. In Lightroom Classic 11.0, Lightroom 5.0, and the most-up-to-date mobile apps, these tools have all been consolidated under a single Masking tool along with more flexible and Photoshop-reminiscent powerful masking tools (like color range & luminance range!!). Once applied, these masks will appear as flexible layers that you can name, select, and further adjust. Create perfect localized adjustments every single time!
You can find the new Masking tool to the right of the red-eye correction tool, beneath the Histogram, in the Lightroom Develop panel in Lightroom Classic:

In the Cloud-based Lightroom, the Masking tool will appear on the right-hand toolbar as a circle with a dotted outline:

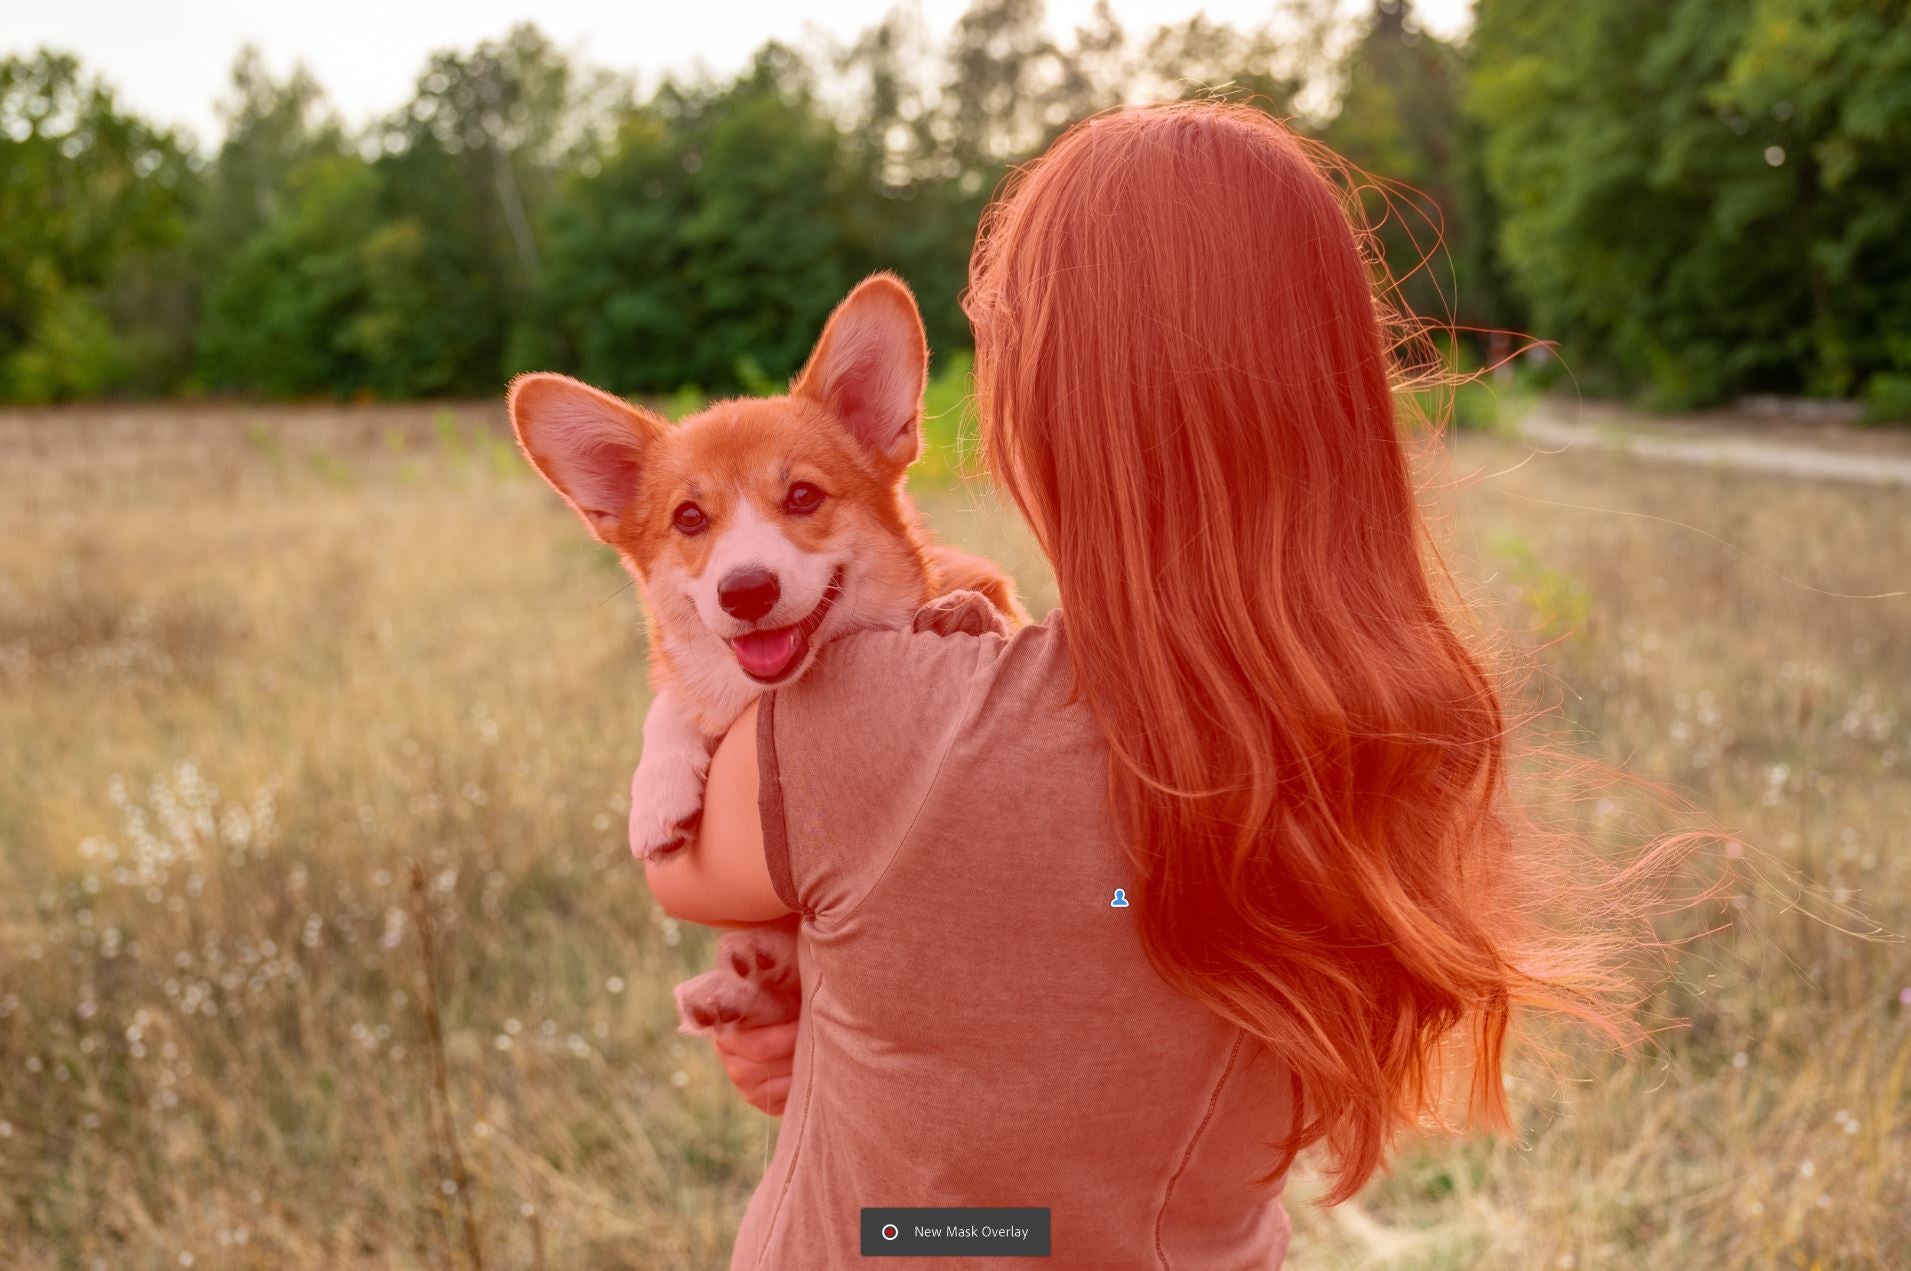
When you select the Masking tool, you will see the option to “Create New Mask"/+, with a pop-up of possible select options:

These options may also appear below the Masking tool:

For “Select Subject” and “Select Sky”, simply apply with a click and wait a few quick moments for the tool to auto-detect the target:


Comparatively, this new AI masking tool is easier and faster.
Once masked, you have the option to adjust that mask with Add or Subtract options in the Masks panel:

If planning to make more extreme adjustments to your selection, you may choose to refine the auto-masked selection with the brush.
In this example, too much non-subject information was masked via “Subject Select” (this often happens with darker or noisier images):

With a quick brush subtraction, we’ve got something a little cleaner:

A “Select Subject” Workflow in Action in the Lightroom (CC, 5.0) app
This sample workflow features a lovely photo by Johanna Cryer. Here, we demonstrate how to bring subjects back to life after application of a moody edit within a darker image:

2. Subtract excess selection via Subtract > Brush:

3. Make slider adjustments to make subjects pop:

This process is just as simple on mobile for iOS and Android (for paid app subscribers, as this is a premium feature). And with a light-touch adjustment, you may not even need to subtract or edit the AI-selection. We've found the new AI masking feature in Lightroom a total game-change for backlit iPhone photos with shadowy or grey subject faces. Check out our Instagram Reel that describes how to use AI masking in Lightroom mobile.
I don't know about you, but we're pretty excited about this tool. We're hearing some cheerful buzzing in the photography community as well. We encourage you to play around with this amazing new tool to see how it transforms your workflow. Try it out with some of your Luxe presets, and be sure to tag us #learnwithluxe on social for a chance to be featured!
Note: This feature is only available in the most up-to-date versions of Lightroom, Lightroom Classic, and as a premium feature in the latest Lightroom mobile apps.


