An introduction to Lightroom's Adjustment Brush Tool
The adjustment brush tool in Lightroom is one of its most powerful editing tools. Getting acquainted to its use will let you significantly extend the amount of manipulation you can do without having to leave Lightroom. Unlike global adjustments, the adjustment tool selects and modifies specific image areas. It goes miles beyond what its name implies, as it can easily adjust single or multiple photographic parameters like exposure settings, white balance, sharpness, contrast/clarity and so on.
To access the adjustment brush, you must be in the Develop module. Then, click the far-right tool in the tool pallet, just below the histogram panel. The shortcut for fast access is the letter "K". This is how the adjustment brush menu looks:
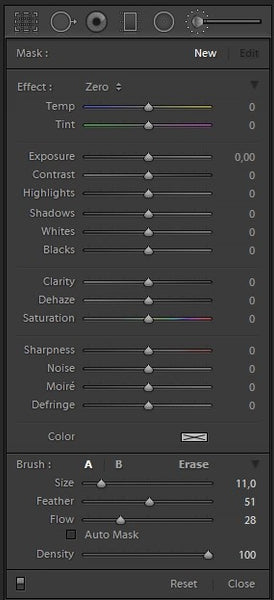
It is divided into Mask, Effect, and Brush subareas. Each has its very own purpose that I explain below:
Mask: This is where we choose a new adjustment (default selection is in white lettering when we first access the adjustment brush tool) or edit an existing one.
Effect: Contains a bewildering number of adjustment sliders. Imagine any adjustment you may want to make to a part of your image and you will be able to just that with this fantastic combination of sliders. What’s great about the adjustment brush is that Lightroom allows us to create and reuse adjustment brush presets. Lightroom already has some effects built in, but you can also create your own and access them via the dropdown menu just on the right of the "Effects" badge (shows the word "Zero" above, as no sliders have been yet adjusted). What is even better, is that you can buy readily available brushes to speed up local adjustment work. All of the Luxe branded collections come with collection-specific brushes. There is also a color feature that allows one to brush on selected colors on parts of an image, but unfortunately, this extends beyond the scope of this article.
Brush: Here is where we fine-tune brush features. I will explain each feature separately, as each is critical in controlling brush adjustments:
- A and B: By choosing one or the other, you can have ready access to two different brushes. For example, a large soft brush and a small hard one.
- Erase:Allows the deletion of features already brushed on the image, but does not affect the image itself! The best way to access the erase feature is to hold down the "Alt" key on the keyboard ("Option" key on a Mac).
- Size:Controls how large the brush is. Instead of using the slider, I find it much easier to control size with the scroll wheel of my mouse or with the square brackets ("[" and "]") on my keyboard.
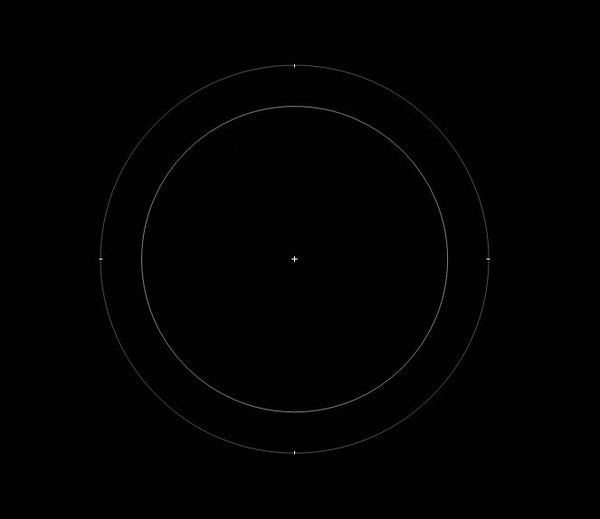
- Feather: Adjusts the size of the feather transition zone. Low feathering results in a hard brush with a very narrow space between the inner and outer circle for the brush tool, while high feathering results in a softer brush.
- Flow: It determines how your brush strokes add up to reach 100% coverage. With low flow, you will need many brush strokes to gradually reach full effect, while 100% immediately results to full effect.
- Auto Mask: This is a killer feature of the adjustment brush that most definitely have to grow accustomed to. When switched on, it automatically detects area borders in your image and keeps brush action within them. Although not as precise as Photoshop selections, in most cases, it does an extremely effective and fast job that will save you from going from Lightroom to Photoshop and back again. Note that Auto Mask also works when you erase.
- Density: Strength of brushing. This is similar to flow, but the difference here is that density does not act additively and for this reason, I generally prefer the added control of the flow slider.
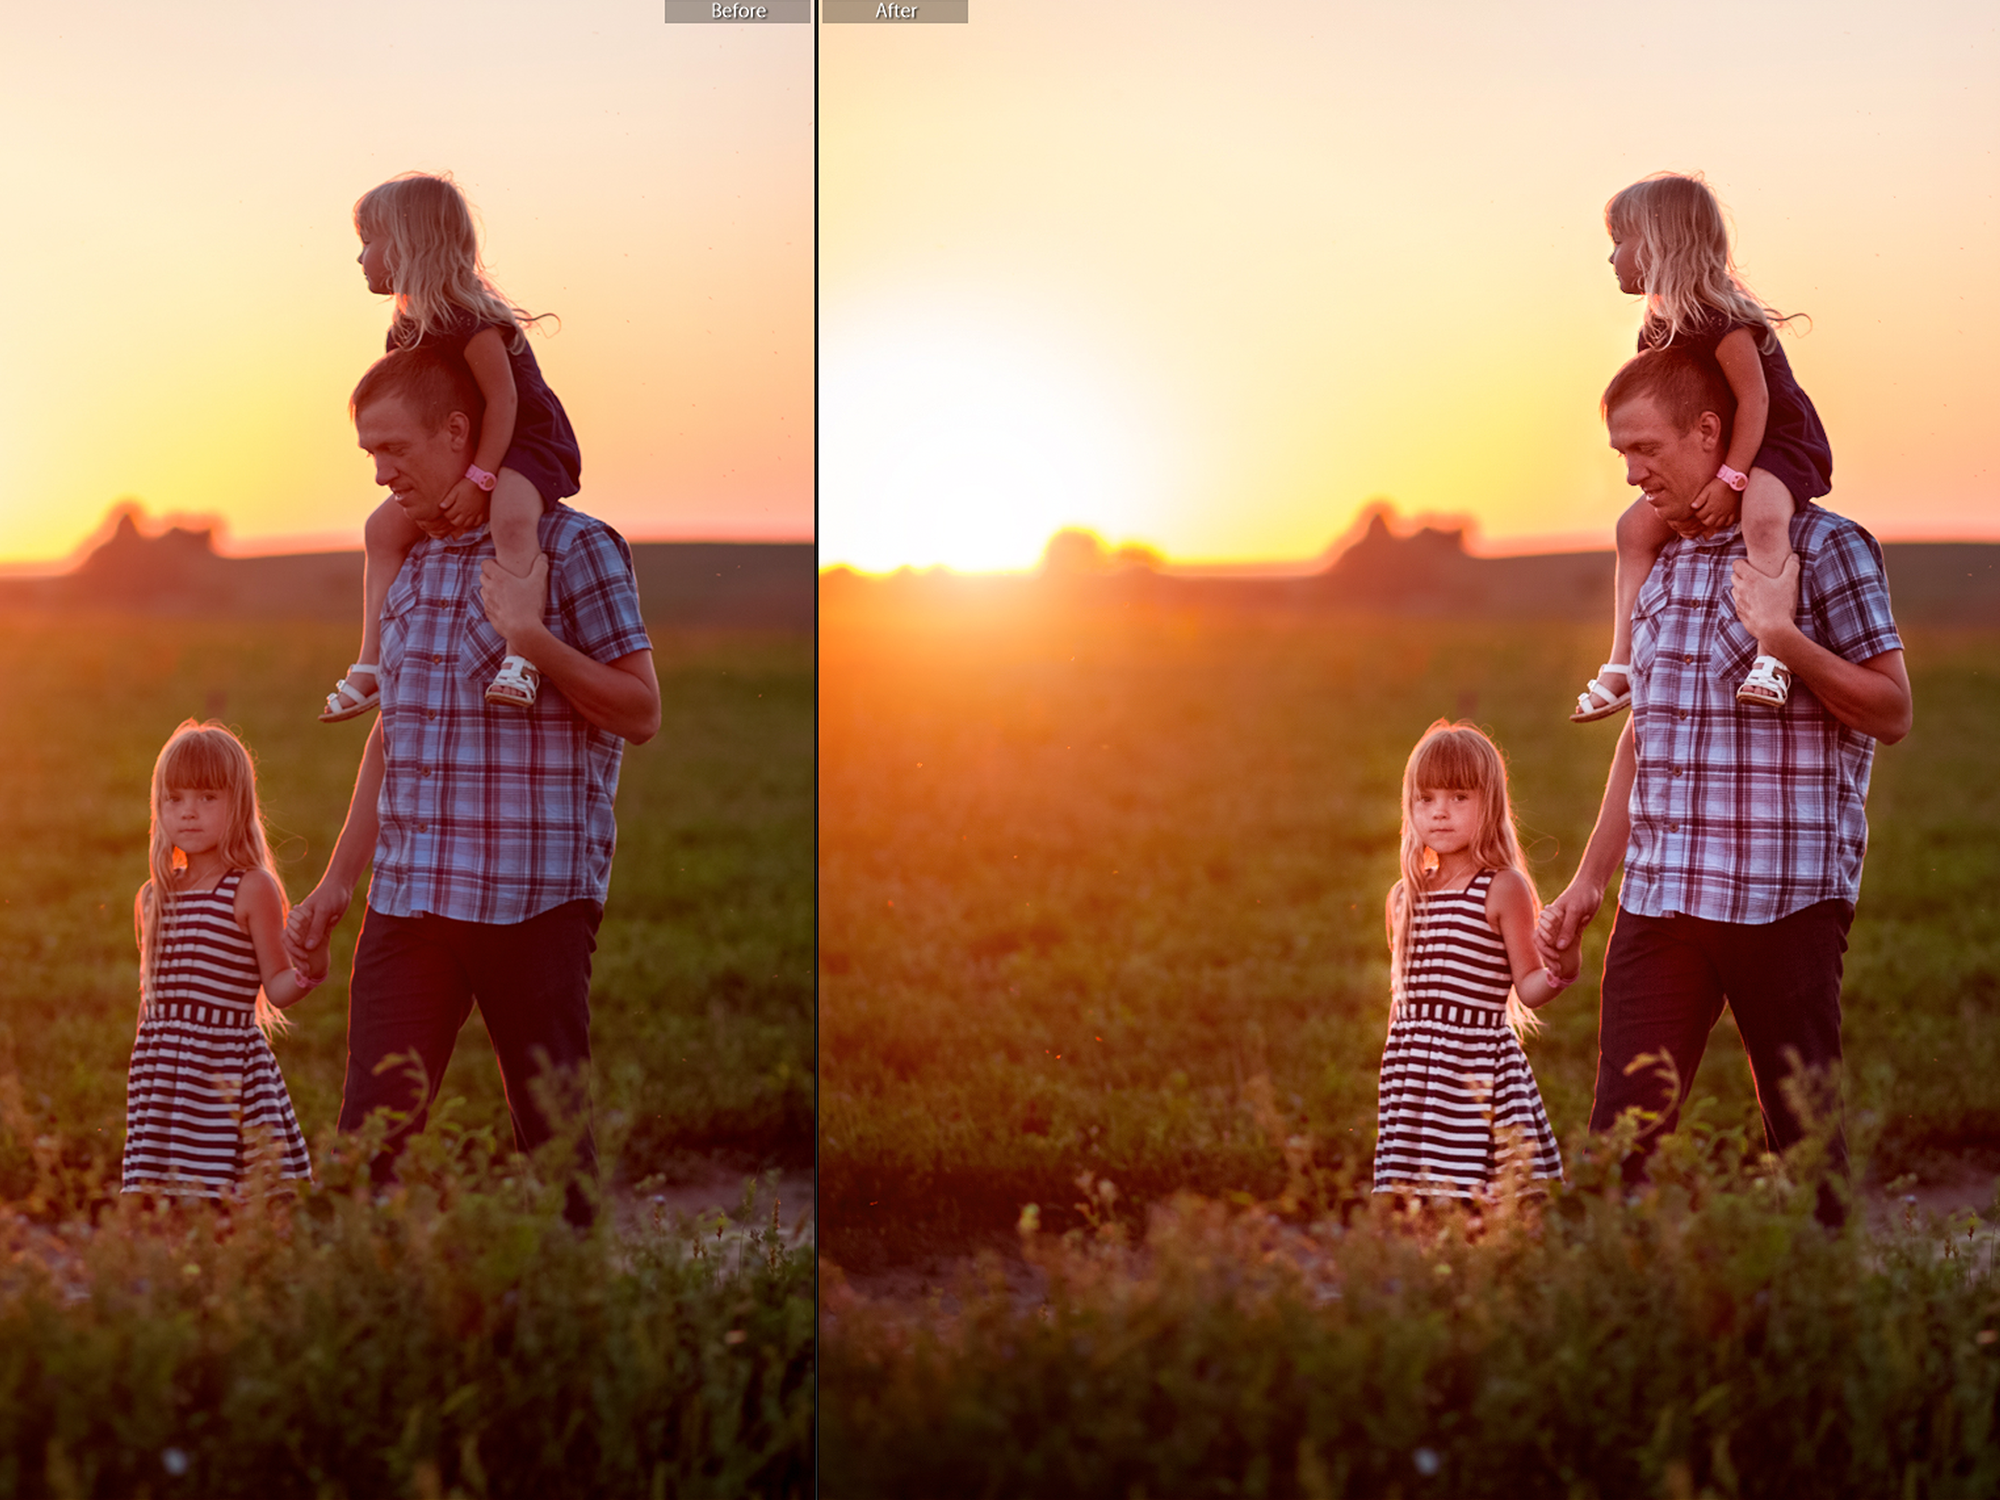
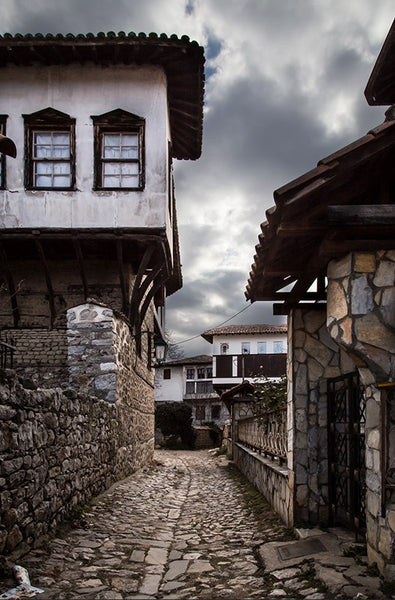
To show you the power of the adjustment brush, I’ll go through a very simple example. The image below is underexposed and has extremely dark shadows, to the degree that it initially looks unsalvageable:
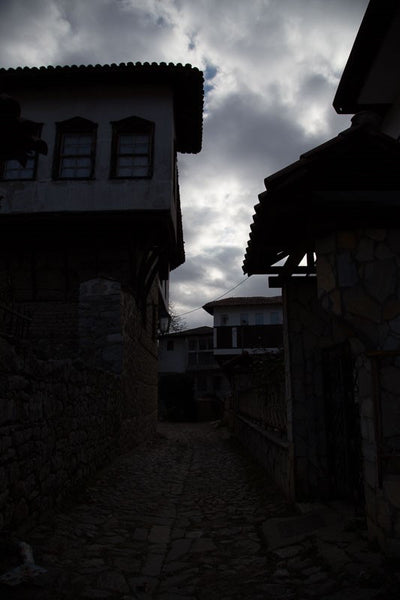
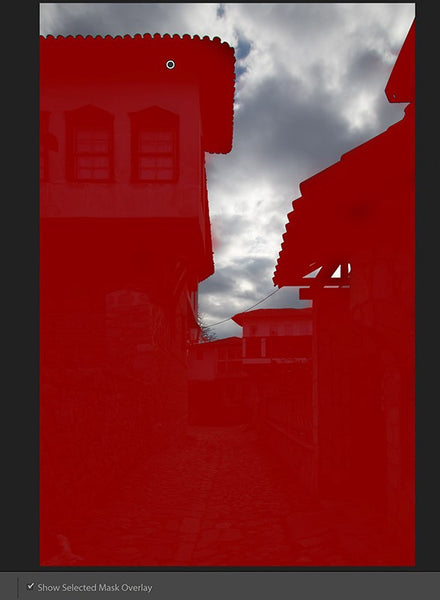
The sky looks attractive but we clearly need to lift the shadows for correct exposure balance. To do this, I press "K" to access the adjustment brush and I adjust my exposure to +2.84. To keep my selection within the dark area, I tick the Auto Mask box. I also check the box labeled "Show Selected Mask Overlay" at the strip below my image (the shortcut is the letter "O"), so that Lightroom marks with a red colored overlay the areas on which I have brushed. I take care to press the Alt key when I need to erase accidentally brushed areas:
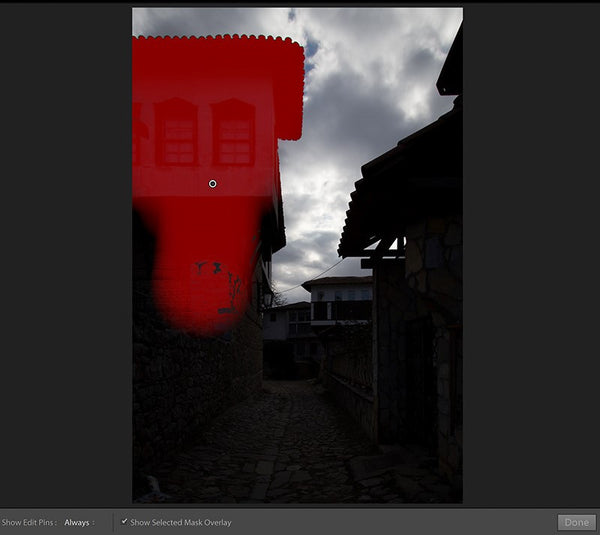
The small circle on the selected area is called an edit pin. A selected adjustment is signified by a pin with a dot inside it. With multiple pins, only one can be selected at a time. Every time we want to edit a selection, its respective pin has to be clicked on. This is my resulting selection:
I press "O" to disable the overlay. The image that follows is my image without any other adjustments!
Each edit pin and its respective selected area is the equivalent of layers in Photoshop. Lightroom has everything stored in its catalog so that if you want to further edit, you can always go to your adjustment brush and modify, add, or erase.
Bonus "Hidden" Feature: Strength Slider
A great little lesser known feature of the Local Adjustment Brush, is the option to adjust the "Amount" of the effect on your image, in other words, this works like a strength slider (the larger the number, the stronger the effect).
To locate this slider in your Local Adjustment Brush panel, simply look to the right of the "Effect:" options. You should see a little arrow pointing down:

Click on this arrow, to reveal your "Amount"/strength slider, and quickly adjust the overall strength of the brushed-on effect! Click that arrow again to return to your normal brush settings.

I hope that from this brief introductory article, it is clear that Lightroom's adjustment brush tool has immense power. Welcome to the village!