


Lightroom offers specific retouching tools that will enable you to present professional portraits to your clients that you can feel confident about. The tools that we're going to focus on today are the spot removal tool in heal mode, as well as the adjustment brush soften skin effect. Check out our Lightroom portrait presets collection to add these to your toolkit. These tools can yield amazing results and take your images to the next level, so let’s dive in and learn how to use them!
Getting Started
First things first, let’s get your image into Lightroom. Go ahead and import your photo. You should see something similar to the set-up below.

RETOUCHING IN HEAL MODE
STEP 1 - Zooming in for a Better Working View
First, you'll want to zoom into the location you would like to retouch. To do this, in the top right-hand corner, in the navigator panel, you have a few view options available. Experiment with the 4 options, Fit, Fill, 1:1, and 2:1 to see what view they produce. For additional zoom options, select the vertically stacked arrows facing opposite directions. See arrow below.
Quick Tip: For a quick way to magnify your image in Lightroom, go to VIEW > ZOOM IN from the drop down menu at the top of the page.

For this particular image, I’m choosing to work in 1:2. I found it gave me the best magnification for what I needed to do. Once you’re zoomed in, you can move the image around with the hand tool to pin-point the exact location you want. This can be done with the image in the navigator box or with the main image.

2 - Locating the Spot Removal Tools
If you notice that your spot removal options are not visible, you’ll need to make sure develop mode is selected in the top menu. Once this is selected, the spot removal icon will appear just below the colorful histogram box. Select the spot removal icon, which is a white circle with an arrow on the right side. Doing this will display spot removal options right below it. Since we're starting with the heal mode, go ahead and select that as well.Quick Tip: You can also make the spot removal icon and tools available by selecting VIEW > SPOT REMOVAL from the drop down menu at the top of the page. Or, for even quicker results, simply press the letter “Q”.

STEP 3 - Adjusting the Heal Mode Options
Before you start retouching, it’s a good idea to adjust your options to get the effect you’re hoping for. This includes adjusting the brush size, feather, and opacity. For the brush size, you’ll want to use the smallest size possible - just enough to cover the area you’re trying to retouch. The feather feature can come in handy when you need to soften edges, since a hard edge can be more noticeable in some instances. You'll want to adjust the opacity when you don’t want to cover up a spot completely. For instance, if you're trying to tone-down wrinkles and don’t want to delete them, this will give the portrait a more natural or realistic look.

STEP 4 - Selecting and Removing Blemishes in Heal Mode
It’s now time to use Lightroom’s spot removal tool in heal mode in order to remove wrinkles and blemishes. This is an amazing tool that can instantly and easily remove unwanted spots on your images. Heal mode works by automatically sampling nearby “best guess” pixels that will perfectly blend in with the area you're retouching. With everything setup correctly in heal mode (as shown in step 2), you can now select an area to retouch. In this case, I chose to remove a blemish on the woman’s chin. To do this, I placed the cursor over the area and clicked once. The blemish is now removed!

STEP 5 - Slight Adjustments
You may find that after you make modifications, you still need to make slight adjustments to the original coverage area, the area being sampled, or the brush size. To change the coverage area, place the cursor over the original area, and when the cursor turns into the hand tool, you can then move the location.
When the computer’s best guess at sampling similar pixels was in fact not a great guess, you can move the sample area by placing the cursor over the 2nd circle that has an arrow attached to it, and move it to a better location.
If you need to change the size of the brush to have a larger or smaller coverage area, you simply put the cursor near the edge of the original circle and drag until you see the appropriate size.
If you simply want to start over, you can click either circle and press delete.

STEP 6 - Removing or Reducing the Appearance of Wrinkles
Removing wrinkles can be a little challenging compared to removing a blemish. This is because the coverage is often larger and continuous. To remove or reduce wrinkles, repeat the same steps as above. But this time, drag the circle along the length of the wrinkle. If you want to completely remove the wrinkle, set the brush opacity to 100. Be mindful that removing all wrinkles can give a fake or unnatural look. For the wrinkles you keep, you may want to lessen their appearance by sliding the opacity a little further away from 100. As this woman has only beginning forehead lines, the removal is simple and nearly unnoticeable.


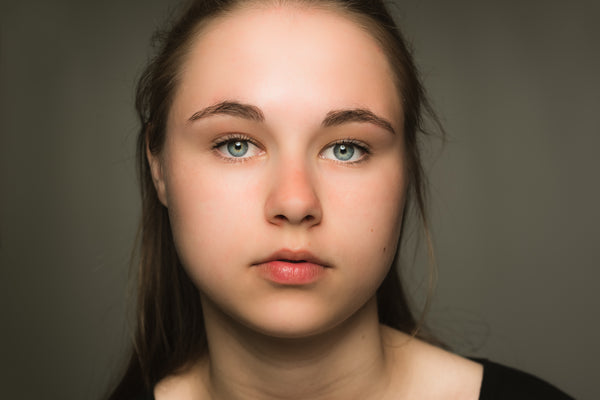
Here is the image after subtle removal of blemishes and fine lines:

SMOOTH THE SKIN
Once you finish fixing the wrinkles and blemishes in your portrait, it’s time to apply the final touch - the soften skin effect. This effect has the potential to dramatically improve the look and quality of your image. It removes pores and fine lines, and gives an overall healthy skin look.
STEP 1 - Selecting the Adjustment Brush and Soften Skin Effect
To locate the soften skin effect, first select the adjustment brush icon (see red circle below) located in the same menu bar as the spot removal tool. Once this is selected, the effect menu becomes visible. To the right of the word effect, you will see up and down arrows, click on them to reveal the drop-down menu and select soften skin. Quick Tip: Press the letter “K” - it’s a short cut to make the adjustment brush panel visible.
As with the heal tool, you can adjust the size of the brush and the feather. You also have some additional options such as adjustment of flow and density. The flow controls the amount of effect that is applied, and the density controls transparency. Experiment with these adjustment brush properties to see how they affect your image. Here I am using the "Skin Softener" brush from the Luxe Portrait Collection.

STEP 2 - Applying the Soften Skin Effect
Now that your settings correct, you can start softening the skin. To do this, simply start brushing over the parts of your images that you would like to soften. A black and white pin will appear where you start brushing and is an indicator that the brush is active. To better view the areas you have brushed over, select the show selected mask overlay option, located just below the image. This will apply a red mask. Once the mask is visible, you might notice there are areas that you did not mean to cover. You can easily erase these strokes by selecting the erase tool, as highlighted in the image below. Once the erase tool is selected, start brushing over the parts you would like to remove the effect from. Once you’ve perfected your image, click done.

Congratulations! You now know how to reduce and remove wrinkles and blemishes, as well as smooth the skin in Lightroom!

Looking for more ways to enhance your portraits? Make your subject’s eyes pop, remove dark circles, add make-up, whiten teeth, enhance skin tone, enhance skin color, and more! All of these brushes and more are available in our Portrait Collections, Luxe Portraits. The below picture was further retouched using the Glamour preset from the Luxe Portraits Studio Collection. There is a definite difference!
About the Author: Jeanne Romero is a professional photographer, with a specialization in advertising photography. Her Bacherlor’s degree in Advertising Photography is from Rochester Institute of Technology in New York.


