


Overlays - What are Overlays? Overlays consist of an image (.jpeg or .png) that sits on top of your original image as a layer, in order to enhance your image. The layers are often blended by the user to create a realistic composition. Overlays are multi-purpose and can come in many forms from seasonal (rain and rainbows, snow, fog, skies, petals, and leaves), to everyday magic (bubbles, glitter, light leaks, bokeh, confetti, and fairy dust)!
We are seeing creative work explode lately! This means we're getting a lot more questions about resources like photo overlays. Our most frequently asked questions regarding overlays have to do with how to import or "install them", so we want to jump on the blog and discuss Creative Cloud libraries. Then, we want to introduce Adobe's new Contextual Toolbar as an amazing resource for learners ready to step their toe into Photoshop waters this summer! Whether you are new to Photoshop and/or overlays, want to learn to create composite images, or simply looking for a faster way to do things, we hope you'll take a moment to learn with Luxe!
Libraries - Organize Those Overlays!
Have you ever been working in Photoshop on your desktop, laptop, or iPad and wished you had quick access to your Photo Overlays directly from your workspace in Photoshop? With the Adobe Creative Cloud Libraries you can! This is especially great for iPad users who don't wish to overload their device storage with large image files.
There are two really easy ways to build Creative Cloud Libraries for easy access to your overlays in Photoshop or on-the-go! Option one involves building libraries directly in Photoshop via the "Libraries" tab! Option two involves organizing within the Creative Cloud Desktop App under "Files" > "Your Libraries" (Learn more about this option here on the Luxe Help Center). You can also access Libraries via your web browser by logging into your Adobe account. (Note: This does count toward your total cc storage space).
Here we'll discuss building libraries in Photoshop for overlay organization, and then walk you through using overlays to enhance your images.
Building Libraries in Photoshop
To begin, launch Photoshop and open any image you'd like to work on. Then locate the Libraries window in your Photoshop workspace via "Window" > "Libraries:

1. In the Libraries window, you can create a Library via "+ Create new library" and name the library something like "Luxe Overlays" or "Luxe Resources":

Or you may choose to create groups in the already established "Your Library" by clicking into "Your Library" and selecting the file folder icon on the bottom of the window to create a "Group":

Whether you want to create individual groups for each overlay collection within your library, or simply want to dump all of your overlays into one group or directly into a new library you created, the process for adding your overlays is as simple as drag & drop. Many users also like to have a "Favorite Overlays" group (or subgroup) for quick access of their most used resources.
2. With your desired system created, you can simply drag and drop unzipped JPG and PNG overlay files directly into your new group(s):

3. Once dropped into your libraries window, you will see them all as thumbnails and be able to quickly drag and drop the overlays of your choice directly onto your images as Smart Objects:


From there simply place, resize, and mask away to your heart's content:

New to masking or not sure how to quickly navigate the options? Follow along below as we walk through making quick work of overlays with help of the contextual toolbar!
The Contextual Toolbar - Make Quick Work of Overlays
With the Generative Fill update, Adobe introduced the Contextual toolbar. This handy-dandy toolbar floats in the primary workspace and adjusts to fit the context of whatever you are doing. It's a user-friendly win for learners, as it highlights tools relevant to your task and makes quick work of processes that would often involve a wide range of tools from opposite ends of the workspace - like masking and blending overlays to create composite images!
Here we'll walk through some of those relevant tools presented by the contextual toolbar, and how they're utilized in the process of compositing. To follow along, you'll need:
- To have Photoshop completely up-to-date.
- An image to use as a base.
- An overlay, or overlay collection of choice.
1. Open your base image in Photoshop.
If using a RAW image and it auto-opens in Adobe Camera Raw, you can go ahead and edit at this time - but sometimes you'll find that tone matching is easier if you edit after the overlay and blended with your image.


2. Drag & Drop an Overlay onto Your Target Image.
With the image open in your workspace, you should be able to simply drag and drop your overlay on top! Whether you organized your overlays into your Creative Cloud library as outlined above, or you're storing them directly on your computer (or external hard drive), you can drag and drop your desired overlay right over into Photoshop.
3. Scale & Place Your Overlay over Your Target Image.
Once you drag the overlay onto your image, you'll see options to scale, resize, and place the image. Depending on the type of overlay you are placing, you'll make different choices regarding where and how to place the overlay, as well as how big to scale the image up or down.

The contextual toolbar will show: Rotate Counter-Clockwise, Rotate Clockwise, Flip Vertical, Flip Horizontal, Cancel Placement, and Done:

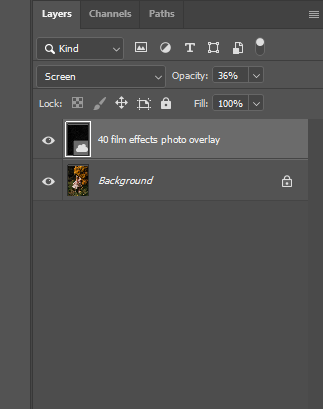
4. Set Blend Mode & Adjust Opacity As Needed
For black background JPG overlays, you'll want to use either "Screen" blend mode in your layer panel to get rid of that black background and only see the details you'd want to see from the overlay. You can also adjust opacity to taste - especially in the case of things like sunlight, solar flares, or bokeh.

For transparent background PNG overlays, you can typically forego changing the blend mode. For things like falling petals, and leaves - you wouldn't want these to go transparent the way that you'd want to see with light, snow, rain, or similar effects.

5. Apply A Layer Mask and Manipulate as Needed.
The most common overlay question that we get from learners after "How do I import/save overlays?" and "How do I get rid of the black background?" is "How do I remove the overlay from my subject?". You can quickly remove overlay effects from your subject with help from the contextual toolbar!
How to remove overlay from subject:
1. Select the target image layer.

2. Click "Select Subject" on your contextual toolbar.


3. Click on the invert selection button on your contextual toolbar.


4. With that selection made, select the overlay image layer.
5. Click on the create mask button on your contextual toolbar.


How to remove parts of your overlay, without damaging the overlay or the image:
1. Select the overlay image layer.

2. Click the create mask button on the bottom of your layer panel.

3. Click the "Subtract from mask" button on your contextual toolbar to erase the parts of your overlay you'd like to remove.


4. Change to "Add to mask" button to add back any details you may have brushed away by accident.


5. If your changes appear harsh - especially with light/snow/rain or other atmospheric overlays - select the modify mask button on your contextual toolbar and adjust density and feather your mask to taste.

More fun with masks:


6. Blend Tones to Match
Once you are happy with the placement and how much of the overlay you are seeing over your image, things may not yet appear seamless due to tone and light differences between your image and the overlay.
To match to an image that you've already fully edited, you can create adjustment layers, and clip them to the overlay layer to make adjustments that only affect the overlay and allow you to harmonize the layers for seamless blending:

Not sure how to add a clipping mask?
1. Add your Adjustment Layer by clicking on the Adjustment Layer icon next to the Masking Icon. Adjustments like Selective Color, Hue/Saturation, and Curves are most popular for getting overlay colors to match your target image. Selective Color is typically the easiest to navigate for beginners as it involves sliders for each color in the image. 
2. Right-Click or Control-Click on the new Adjustment Layer and select "Create Clipping Mask" from the options - this will make sure the changes you make only apply to the overlay layer. 
3.To adjust your Adjustment Layer settings after applying a clipping mask - click on the adjustment layer's unique icon to the left of he mask and adjust from the window you see:

If you haven't already edited your target image and differences are minimal between the target and overlay, you can cheat this harmonization by simply merging the layers and editing them all together in Camera Raw so everything gets edited the same way. Just to be safe, we recommend using shortcut Control + Shift + Alt + E (Windows) or Command + Shift + Alt + E (Mac) to retain your original layers, but create a new layer on top that represents all of the layers combined + all of the adjustments you made:
Click on this flattened layer and navigate to Filter > Camera Raw Filter... to edit everything all together. In Camera Raw you can use presets or adjust exposure, white balance, and various images settings manually to taste!
Frequently Asked Questions About Overlays:
What sort of photography benefits from overlays?
Many photographers utilize overlays for various purposes. Fine art, creative, and fantasy photographers use overlays to enhance existing atmosphere, create realistic composite images, or to create a completely new atmosphere or environment by adding whimsical elements. Sports photographers add things like fog and lighting effects. Senior and grad photographers will add elements like confetti or glitter. Various traditional portrait photographers may add sunflare, light bokeh, lens flare, fog, or film overlays to add texture and enhance storytelling. Documentary photographers may want to enhance real sun rays, enhance rain, or enhance snow by adding overlays and blending them with natural elements. Hands down - the most popular use for overlays by photographers from nearly any genre? Sky Replacement (Learn more about sky replacement with overlays here). There are so many great uses for overlays!
What if I don't use Photoshop? Is there anything like this for Lightroom?
While Lightroom doesn't allow for layers or blending two images like Photoshop, recent updates to Masking features have allowed us to build beautiful hand-painted and realistic sun, sunlit dust, and snow effects as stackable presets for use in Lightroom! You'll find our most popular sun and sunset effects in the Luxe Golden Hour collection, more sun effects and whimsical sunlit dust in On the Farm 2.0, and various hand-painted snow effects in Let it Snow! 2.0! These effects are one-touch, and fully syncable for effortless dynamic edits in Lightroom!
Do I need the latest software to use Overlays?
No! While the contextual toolbar for Photoshop is new, and the latest features make blending overlays easier than ever - overlays are actually the most accesible and versatile photo resource. They can be used in any software paid or free that allows for layers and blending! Not sure if your software can support overlays or want to learn more about how to use overlays for your specific set-up, reach out to our team at support@theluxelens.com today!
Featured images by Sarah Dowell and Jessica Kelley.


