Instagram’s shift to focus on Reels is no secret, and many have found themselves learning to use various video editing apps like CapCut, VN, and Splice to create compelling content to drive engagement and visibility for their personal work, blog, photography business, or brand. It can be so important to find your own look or edit that fits your brand when editing content, and to match your edits across different types of content. Thus, many have started asking about our video editing resources (LUTs) for editing mobile videos, or matching their video edits to their photo edits! Many want to know if LUTs can be used like presets to edit video, or if they work in Lightroom at all. They also ask if we sell "filters" for video.
Though Lightroom cannot support our LUTs or video editing, we have found that all of the color grading LUTs that we sell for video can be used as Filters for editing photos & video in the FREE VN Video Editor app for iOS & Android! Download of the app is free, super easy to use for video editing and REEL creation, and import of LUTs is quick and painless! If you have purchased our video-editing LUTs or plan to purchase our LUTs for editing video on mobile, we have prepared a detailed guide for using these resources in the VN mobile app below!
What are LUTs?
LUT is short for a Lookup Table, a popular color grading tool that takes a profile of predefined color values and applies these to your image and video content. They are like a preset, look, or filter, but go a little deeper than that, affecting the base color profile of your content in a way that directs look and feel when applying further edits.
LUTs are typically used to edit video/film clips in pro desktop editors like Premiere Pro and Davinci Resolve but can also be used in Photoshop, Affinity Photo, and other photo processors to color grade images. They are incredibly flexible tools and really can make a difference when trying to create a cohesive body of work across different types of content.
LUTs can, but rarely should, do all of the work. So we do recommend further adjustments to suit your clips best and best match your content editing look, feel, and workflow. For example, extremely dark clips will really benefit from a boost to exposure which will in turn enhance the color grading provided by the applied LUT. However, many are happy with a one-click edit or application of LUTs and use them in the same way one would a preset or filter.
How to Install & Use Video-Editing LUTs in the free VN App
Here we will show you both how to apply them as a filter on your mobile device via the FREE VN app, and how to adjust your edit a touch further for your perfect final look. To begin, you will have needed to purchase LUTs and have downloaded the VN App for iOS or Android
Installing LUTs in VN for Apple/iOS


Installing LUTs in VN for Android


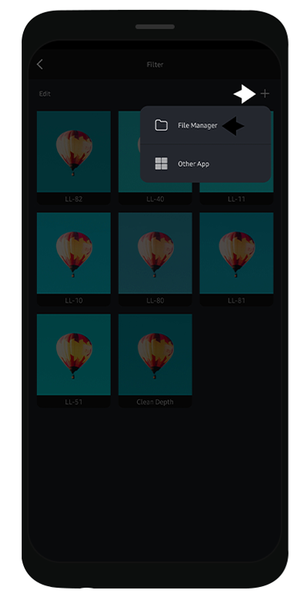

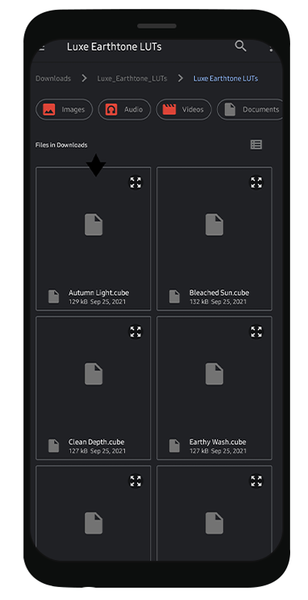


The process for using LUTs as filters in VN is incredibly easy and can really help to make your content cohesive and beautiful across content and platforms.
We are so excited about this new possibility for our LUTs, and their use in creating beautiful video and Reel content. For additional support you can reach out to our team at support@theluxelens.com with any questions! Happy Editing!