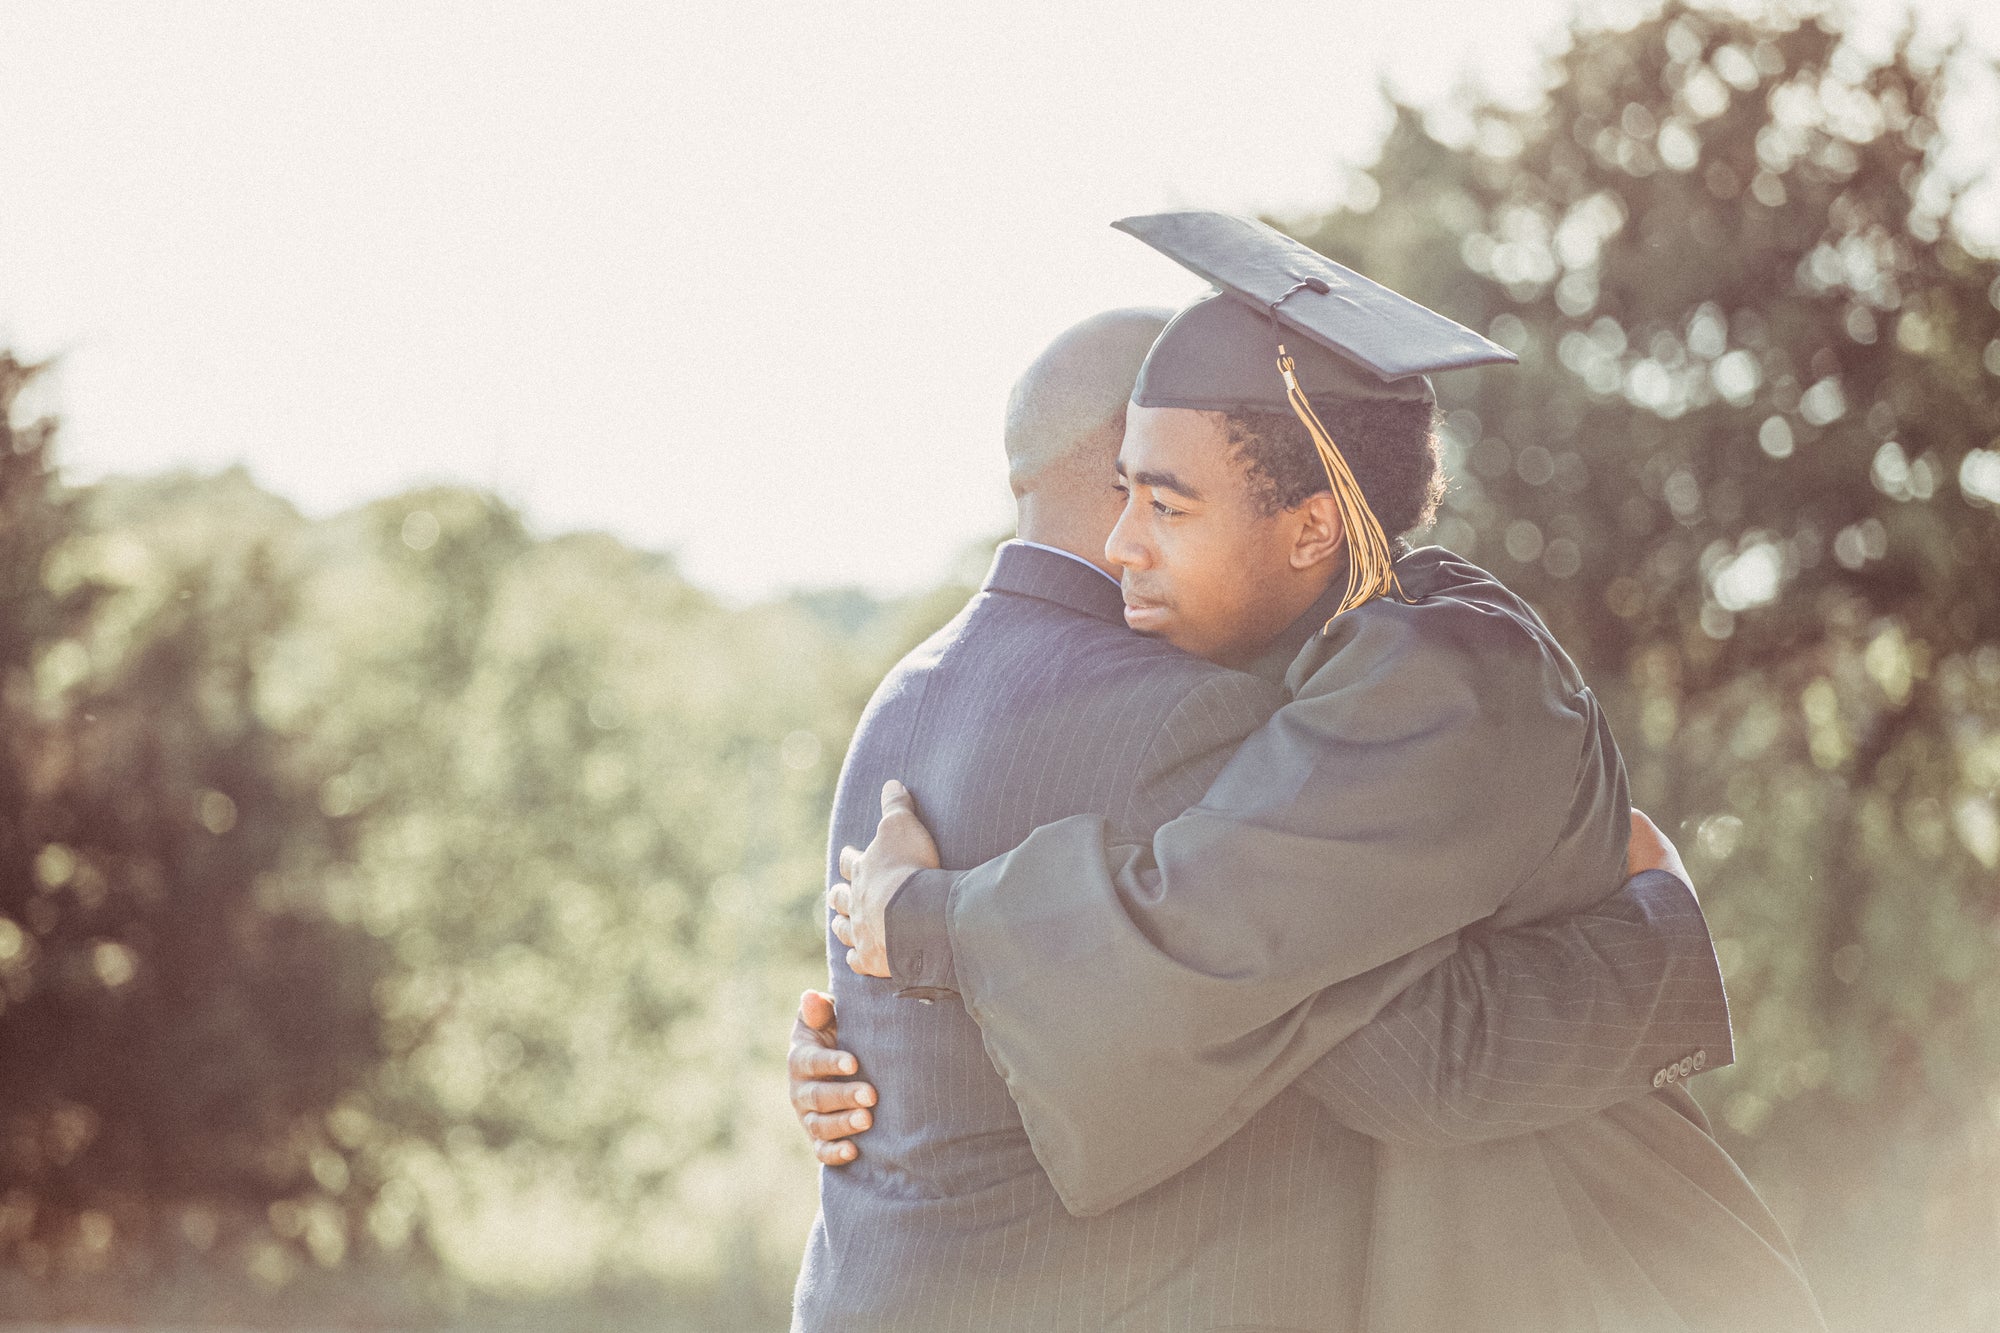
Dominate Your Next Senior Photo Shoot
A quick search for senior portrait inspiration can quickly turn up a nauseating sea of sameness. From the merely mediocre to the downright cringe-inducing, your options are plentiful. Whether it be stiff, uncomfortable teenagers grimacing at a camera, or posed into unnatural and sometimes unnervingly over-stylized shot – it can be difficult to figure out what works and what doesn’t.
Poor senior photos aren’t always the fault of the photographer. Sometimes it’s just a perfect storm of awkwardness, unfamiliarity, and unrealistic expectations. But with experience and training, you can learn to avoid major pitfalls and unlock the key to natural, comfortable sessions that spark truly phenomenal results.
Senior sessions can be extremely vulnerable and nerve-inducing, so it is important to let go of a lot of traditional expectations for prim perfection and really transition into authentic story-telling. Recognize that this may be the first time that your young client has been photographed professionally (outside of school) and this may be incredibly daunting for them. Work to dispel intimidation by being friendly and relatable! You can show vulnerability while also maintaining professional distance.
Three Main Goals
The ideal senior session should work to meet three goals.
-
Demonstrate accomplishment and capture a sense of future goals.
-
Capture who they are as a person
-
Skillfully marry the client’s style and ideas with your artistic vision
These goals may seem like a heavy ask, but we’re here to help. Master your next senior session with tried and true tips for meeting these goals and crafting a bespoke experience for each and every shoot.
Get to Know Them
One of the keys to crafting a remarkable senior shoot is to focus less on perfect posture, hand-placement, and posing, and instead work to embrace and capture who your client is.
There are three primary ways to ensure this happens.
- Schedule a pre-shoot consultation
It’s always a good idea to have some sort of consultation meeting for milestone portraits. We recommend scheduling a coffee shop, studio, or casual outdoor meeting with the senior (and if applicable, the parent of the senior as well).
A virtual meeting is another great option (and time saver) to engage with the client and get a good feel for who they. We recommend developing a laid-back interview that hits all the points you might cover in a formal questionnaire, but in a way that doesn’t make the client feel like they’re being interrogated.
After your consultation, type up a summary of your conversation and send it over to your client. The reasons for this are two-fold. First, it shows that you’re well organized and willing to go the extra mile for your client. Second (and arguable more importantly), this ensures, in writing, that you and the client are on the same page going into the shoot.
- Send over an online personality questionnaire
We recommend this before an in-person or virtual meeting, although it could also be in-place-of, if a meeting isn’t practical. Think of this as a fun, get-to-know-you type of questionnaire. Nothing too deep or personal, but enough to get a sense of who your client is and how they want to identify to those around them.

Edited with Brixton Film Earthy Moods preset collection. Muted grains preset + layer boost + layer sharp
Here are some of the topics you may want to address:
Demonstrate the accomplishment and future goals:
- From what level of education are they graduating?
- If graduating from college, identify area of study.
- Identify extra-curriculars including sports, clubs, organizations, etc.
- Get an idea of their future goals.
- Identify interests and hobbies.
- Identify preferred gender.
- Get an idea of their friend group, what they do for fun.
- Identify style and favorite colors, tones, or general aesthetic.
- Have them name their best feature.
- Sprinkle in some fun and individually-appropriate personality questions touching on nostalgia, values, or what inspires them.
- Ask if there is anything special they want to work into their session.
- Identify ideal style. Do they lean more creative or traditional?
- Identify an ideal location that suits their personality and style.
- Identify a concept.
- Ask them to provide photo inspiration, or details regarding the shots they want.
- Determine if there will be multiple outfit changes, special effects, or props.
- Ask if there is anything they want hidden or de-emphasized in the shots.
- Finally, familiarize them as best you can with your process and portfolio and allow the client or parent(s) to ask questions.
- Involve the parent
Chances are, it’s a parent who is paying for the photo shoot. And even if everything goes swimmingly with the senior, it’s still possible to have an unhappy parent. How can this be avoided? By using the same technique with the parent(s) as you’ve used with the senior.
In our experience, an online survey specifically designed for the Senior’s parent(s) is ideal. In essence, you’ll want a toned-down version of the above survey, with a greater focus on expectations and outcomes. As with the previous questionnaire, make sure to send a written summary to the parent(s) to make sure you’re on the same page. The summary should include insights from both surveys and any in-person/virtual meetings.
At the end of the consultation, address applicable deposits, save the date, be sure to share and sign any relevant paperwork, and make sure that everyone has a copy. To avoid managing too much paperwork, employ an online solution such as Adobe DC.

Edited with Brixton Film Earthy Moods Lightroom preset collection. Afternoon sun preset + dynamic range++ tool + split tone green/red tool
Plan the Shoot
Much can be mitigated in the pre-consultation. However, proper planning is crucial to carrying that through.
Here’s what that planning can look like:
- Establish the location.
It isn’t always realistic to have already visited a preferred location, but it can be helpful to familiarize yourself with images online. Google Earth comes in handy to scout out relatively unknown locations. We also recommend utilizing Instagram’s search feature. Search for your locale under “Places”, and you’ll be able to review inspirational shots from that location.

Edited with Luxe Fairy Tales and Color Pop Lightroom preset collections. Dust like magic preset + Colorpop slight green tool + teeth whiten brush.
Be aware of the weather, sun tracking, possible event interferences, and other out-of-your-hands factors for the booked date. For mother nature, we recommend finding an app to regularly track this. For other interferences, make sure to call ahead or check online for scheduled events in your location of choice.
Once these factors have been established, decide on a general flow of shooting spots. Make sure to give yourself room to wiggle with each planned spot.
- Decide outfits in advance.
Fashion is personal and dramatically changes with each generation. Make sure to keep an open mind when reviewing outfit options presented by your senior and offer guidance with compassion. Keep in mind that what was cool during your senior year may not look very much like what’s cool now. The goal is the establish a balance between an outfit they love, an outfit their parent(s) doesn’t hate, and an outfit that is appropriate to show in a photo that grandparents may hang on their wall.
While tempting, we recommend dissuading seniors from spending a bunch of money to buy or rent something they think they *have* to wear. When selecting outfits, the goal should be comfortable and confident. Do they have a go-to outfit that they love? Toss it in.
Most shoots include two outfit changes: the personality outfit and the graduation regalia. Many of us encourage seniors to bring up to five pre-approved outfits. Often, the shooting environment will help to solidify the final choice.

- Find out who is coming and what they’re bringing along
Common side-kicks at senior photo shoots include parents, friends, and siblings. It’s important to understand the relationships and respect them. Is the senior happy that Mom is there or does she resent it? You want to come in prepared to navigate either reality. You want your senior to look authentically happy and not authentically bitter. Regardless, it’s ok to communicate to all parties that the primary consideration should be the feelings of the senior versus third party input.
It’s not uncommon to receive a request to bring a pet to the shoot. Pets can be an important part of the senior’s life and they’re so fun to shoot! Going in, make sure to ask about the temperament and needs of the animal. Also make sure that the senior’s outfit choice matches well with the color of the pet!
Finally, it’s really common to work with props at a senior photo shoot. Have a plan for toting these items if there is no side-kick available. We recommend a foldable wagon with all-terrain wheels. Common props include instruments, books, sports gear, culturally significant items, etc. Special effect props like confetti, champagne, and smoke bombs are less common, but still present. Just make sure that if you use special effect props, they’re venue appropriate and you have a pre-planned clean-up plan.

- Create and share an ideal shot list
Organize must-have shots by time, outfit, props needed, and shooting location, as applicable. Create a Pinterest board and/or assign a shared folder or other collaborative space that can house all of this information and inspiration.
Make as much information as possible available to your client before the shoot. This way, planning feels collaborative. It also helps to ensure that everyone heads into the shoot feeling confident and informed.
Dominate the Day
- Keep your client confident, comfortable, and authentic.
Both you and your client should be heading into the shoot with realistic expectations, along with a friendly, confident ease that lends to a productive and collaborative atmosphere.
Tips for keeping your client engaged:
- Maintain steady, natural conversation, that breeds trust and comfort.
- Encourage your senior to bring out what you’ve learned of his/her/their personality.
- Don’t be afraid to experiment and have fun when/where the client’s personality and comfort-level lends to it!
- Try to maintain a fun, carefree perspective that’s open to healthy spontaneity. This is preferred over being too detail, time, or plan-oriented.
- Get your senior talking about passions and future goals in between shots!
- Compliment them genuinely, consistently and authentically.
- Don’t be afraid to show your client a great shot or two in camera to get them hyped for the final product!
- Prompt. Don’t pose!
Leave the posing to the yearbook photographer, and avoid micromanagement. You can still get stunning cap and gown portraits that feel formal and will be resoundingly parent-pleasing without micro-adjusting or posing. Always be sure to prompt with the individual in mind, and avoid leading them down a path they can’t follow or instructions that don’t fit them. Pick up on when you’ve missed the mark and vocally own this. This humility helps to build repore with your senior. With the right prompts you’ll hit your key shots without ever breaking up the natural, authentic atmosphere you’ve worked so hard to cultivate.
Always begin by directing the client. Be short and sweet with directions. Let your client know what to do physically, and then introduce the prompt. The purpose of a prompt should be to elicit and capture natural movement and response in a way that results in an expected outcome. You lead your client towards a goal with your words.
You may be asking “How do I develop a prompt that gets me what I want?” Here are some examples:
----
What you want: A sitting pose where your client is leaning towards the camera with a genuine, full-on smile.
How you direct: “Sit, lean forward, and laugh”
How you prompt: “Imagine a squirrel flying in and snatching the tassel off your grad cap!” (Go with something safe but quirky enough to catch them off guard and to elicit a real reaction.)
----
What you want: A confident, over-the-shoulder look.
How you direct: “Turn your head back to look at me, almost like you felt a hand on your shoulder. Give me focused eyes.”
How you prompt: “What makes you feel strong? Powerful/Fierce?”
----
What you want: Formal, confident, standing portrait with hand in pocket and gown over shoulder.
How you direct: “Start there and walk towards me slowly. Move one hand from your pocket to touching your cap/hair. Toss your gown over your shoulder with the other hand and hold. Repeat a few times.” Variations “start with gown on, take off your gown, and toss it over your shoulder, repeat”.
How you prompt: “Wow! You’ve done it! What’s on the horizon?” This should elicit confidence and thoughtfulness. If you want a smile or laugh throw in something playful like “If you were an emoji, which would you be?”
----
Using this technique, you can still direct in a way that follows poses you know to be winners or that you spotted in your client’s inspiration photos. Simply aim to avoid micromanaging how they hold their heads, place their hands, stand, etc. If too much time is spent on pose corrections or you find yourself spouting micro-adjustments like “lift your chin, no not that far, look at me, up a little, down a little, turn…” don’t be surprised if this leads to self-conscious subject or an inauthentic product. Ultimately, once you get the hang of prompting, it’ll come naturally. And so will those winning shots!
The Shoot is Over. Now What?
The session is over and you’ve got your shots. Next come post-processing and editing. For milestone photo sessions, you’ll want to aim for a timeless editing style that works for print and ultimately honors the vision of your client.
Whether your style leans moody, light and airy, clean and professional, or bold and vibrant, when editing senior portraits, avoid anything that might alter school colors or otherwise obfuscate key aspects of the shoot. Choose timeless over artistic.
When editing in Lightroom or Photoshop we recommend focusing on the following:
Even light
- Adjust exposure as necessary, in way that preserves details in both your highlights and shadows.
- Locally adjust where necessary. Weird shadows? Brush to match.
- Too much sunshine? Try the handy-dandy dehaze slider!
- Make sure your white balance is immaculate. You want your whites/neutrals to be true-to-life to best ensure that all other toning is also true.
- Presets designed for portraits should provide quick, timeless results, that honor natural and true-to-life tones
- Maybe you have your own edit that you swear by and that you’ve built your portfolio around, so you’re scared to try something new? Local adjustment brushes for Lightroom Classic, various quick-click preset tool kits for Lightroom and Photoshop, and workflow actions for Photoshop can provide you with effortless finishing touches that match your classic style.
- Once you’ve nailed your ideal edit, whether through a one-touch preset or a painstaking workflow, you can save time by syncing settings across all similar images within your photo set.
- For best results, try to avoid syncing exposure and white balance, and NEVER sync local adjustments. While a quick sync can save you hours in getting your tones just-right, you never want to neglect key individual adjustments. Especially when working on photos destined for print!
- Be sure to tweak your edit per lighting environment or scene before syncing across a subset.
Whether you deliver your finished product to the client as an electronic gallery, saved to a physical storage device, as carefully selected prints, or a blend of all three, it should be with the pride that you were a part of telling someone’s story. You honored their accomplishments, spoke to who they were as a person, and held true to your creativity and vision as an artist. It can be so easy to fall into gimmicks or trends for a quick buck, and while this may satisfy both parties for a time, to be able to offer something timeless, that both yourself and your client(s) can be proud of for years to come, is a truly meaningful experience.
At The Luxe Lens, we support and encourage photographers at any level to be both proud of their work and unafraid of learning a thing or two to maximize their shooting and editing workflows. Our goal for you is consistently stunning results and happy clients. This year has seen a hard transition back into steady work for many photographers who may have started feeling out-of-the-loop. Hopefully this article helped give you the boost of confidence you need to get out there and own this season. Happy shooting!