


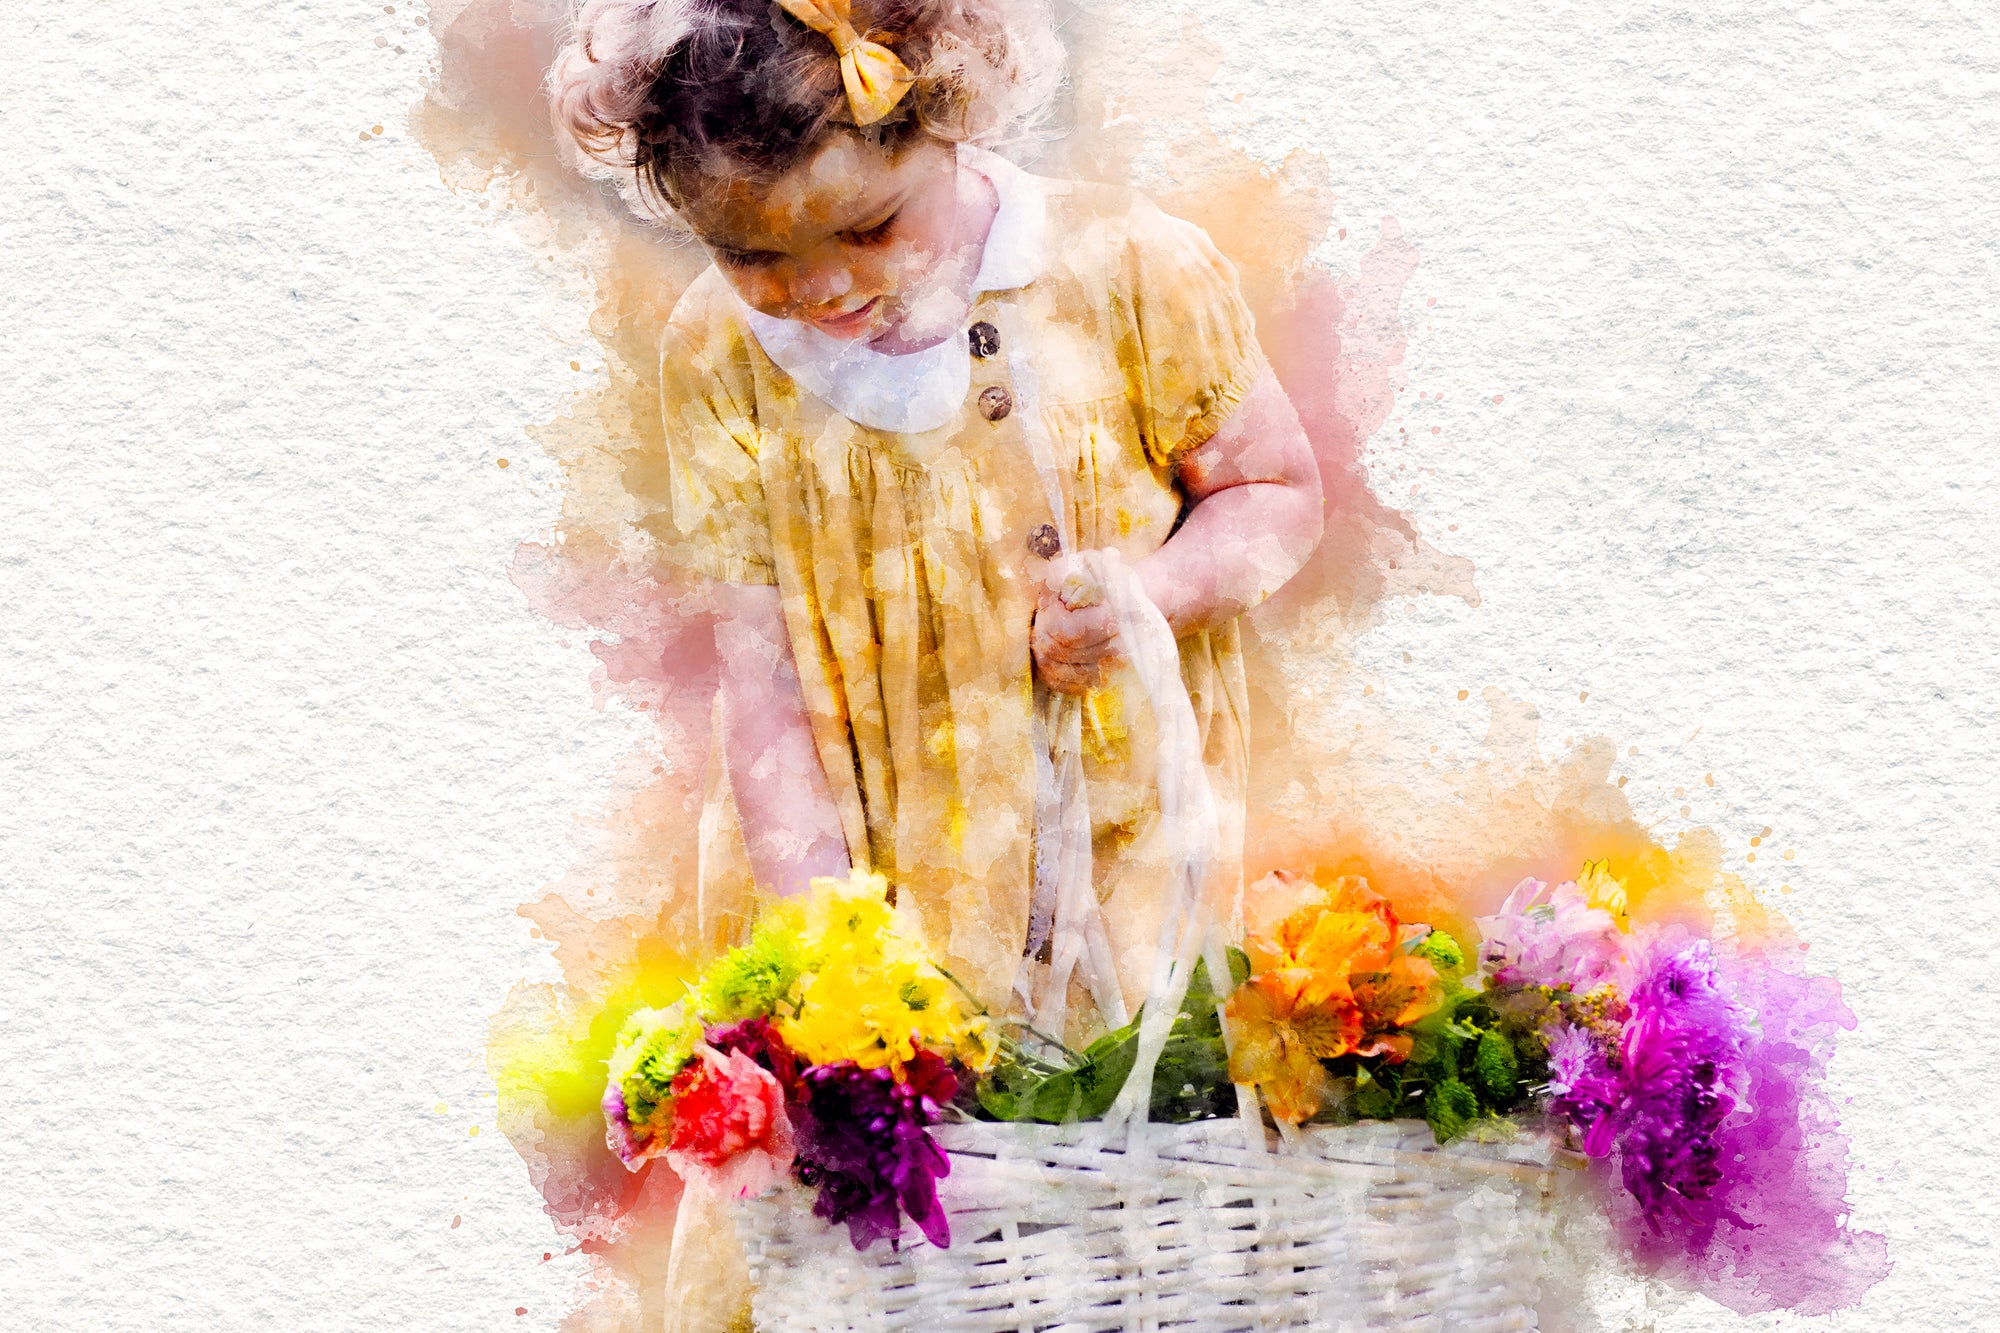
Spring is here and we couldn't be more excited to share a new tutorial with you that is perfect for turning your captures of florals and pastels to art!
Our Watercolor, Paint, & More! Photoshop Actions, Brushes, & Overlays collection is a spring favorite with limitless options to create beautiful watercolor-inspired art. If you are new to our Watercolor collection, you may want to check out our in-depth guide over on the Help Center before continuing here to be sure you have everything installed and are familiar with how our actions and resources are named and organized.
In this guide we'll cover using the watercolor actions and resources in a full workflow, discuss more accurate selection of subject and details, saving selections for masking purposes when modifying your applied actions, and applying additional resources for a bespoke art piece that can be exported for use across print & web!
Custom Watercolor Artwork Guide
This guide requires: Photoshop, an image of your own, and all of the resources included in our Watercolor, Paint, & More! collection.
Step 1 - Launch Photoshop, Open & Ready your Image (Resize, adjust, edit, and color correct before you begin your Watercolor transformation)

Step 2 - Smart Select and Save Selection


Note: When making your selection, you can select additional details missed by Select > Subject by using the Object Selection Tool in your left-hand toolbar while holding down shift.
Step 3 - Run the Artistic Watercolor Action


Step 4 - Click to the target image layer labeled "Background" and apply your saved selection


Step 5 - Click back to the new brush layer with your selection still active and paint with the red brush within that selection

Step 6 - Resume play of your action to complete rendering of artwork

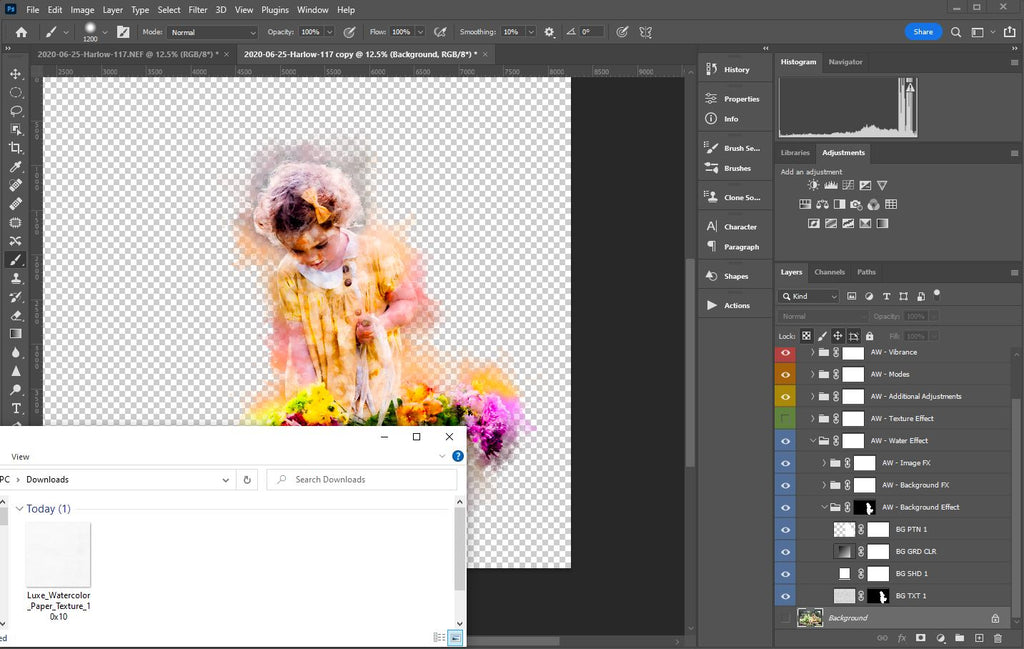
Step 7 - Expand created layer groups to find your Background Effect layer. Click to your Background layer and navigate to Select > Load Selection > and check the "Invert" box to create an inverse selection.


Step 8 - Click on the white mask for your Background Effect Layer and paint with a black brush over your entire inverted selection to remove the background effects.

Step 9 - Toggle off your Background layer

Step 10 - Customize, apply additional resources, clean up, and export for print or web!


It's that easy to create complex, beautiful, custom artwork! If you use a different action than "Artistic Watercolor" you may see some slightly different options when it comes to removing the background effects for a transparent background, but the processes of selecting and masking will work similarly.
You can also create some fun variation by simply using the red brush freehanded when you run your action rather than to fill in a specified selection, and likewise when you go to remove background or other effects you can mask with a freehand for a more fun artsy approach.
Want to put your watercolor art on a t-shirt, mug, or other giftable that requires a transparent background? Simply export your file as a high resolution .PNG at step 9 via File > Export > Save For Web (Legacy)... ![]()
This is a great option for offering bonus art gifts for mini sessions this season, or or to create Easter or Mother's day gifts for print!
Have any questions about the products used here? Reach out to our team at support@theluxelens.com
Featured Photo By: Kim Kelsey


